 Capo
CapoCapo Pro & the workspace
The side panel Pro unlocks — markers, clips, the equalizer, the speed trainer, and the effects the popup does not carry.
Capo Pro and the workspace
What is Capo Pro?
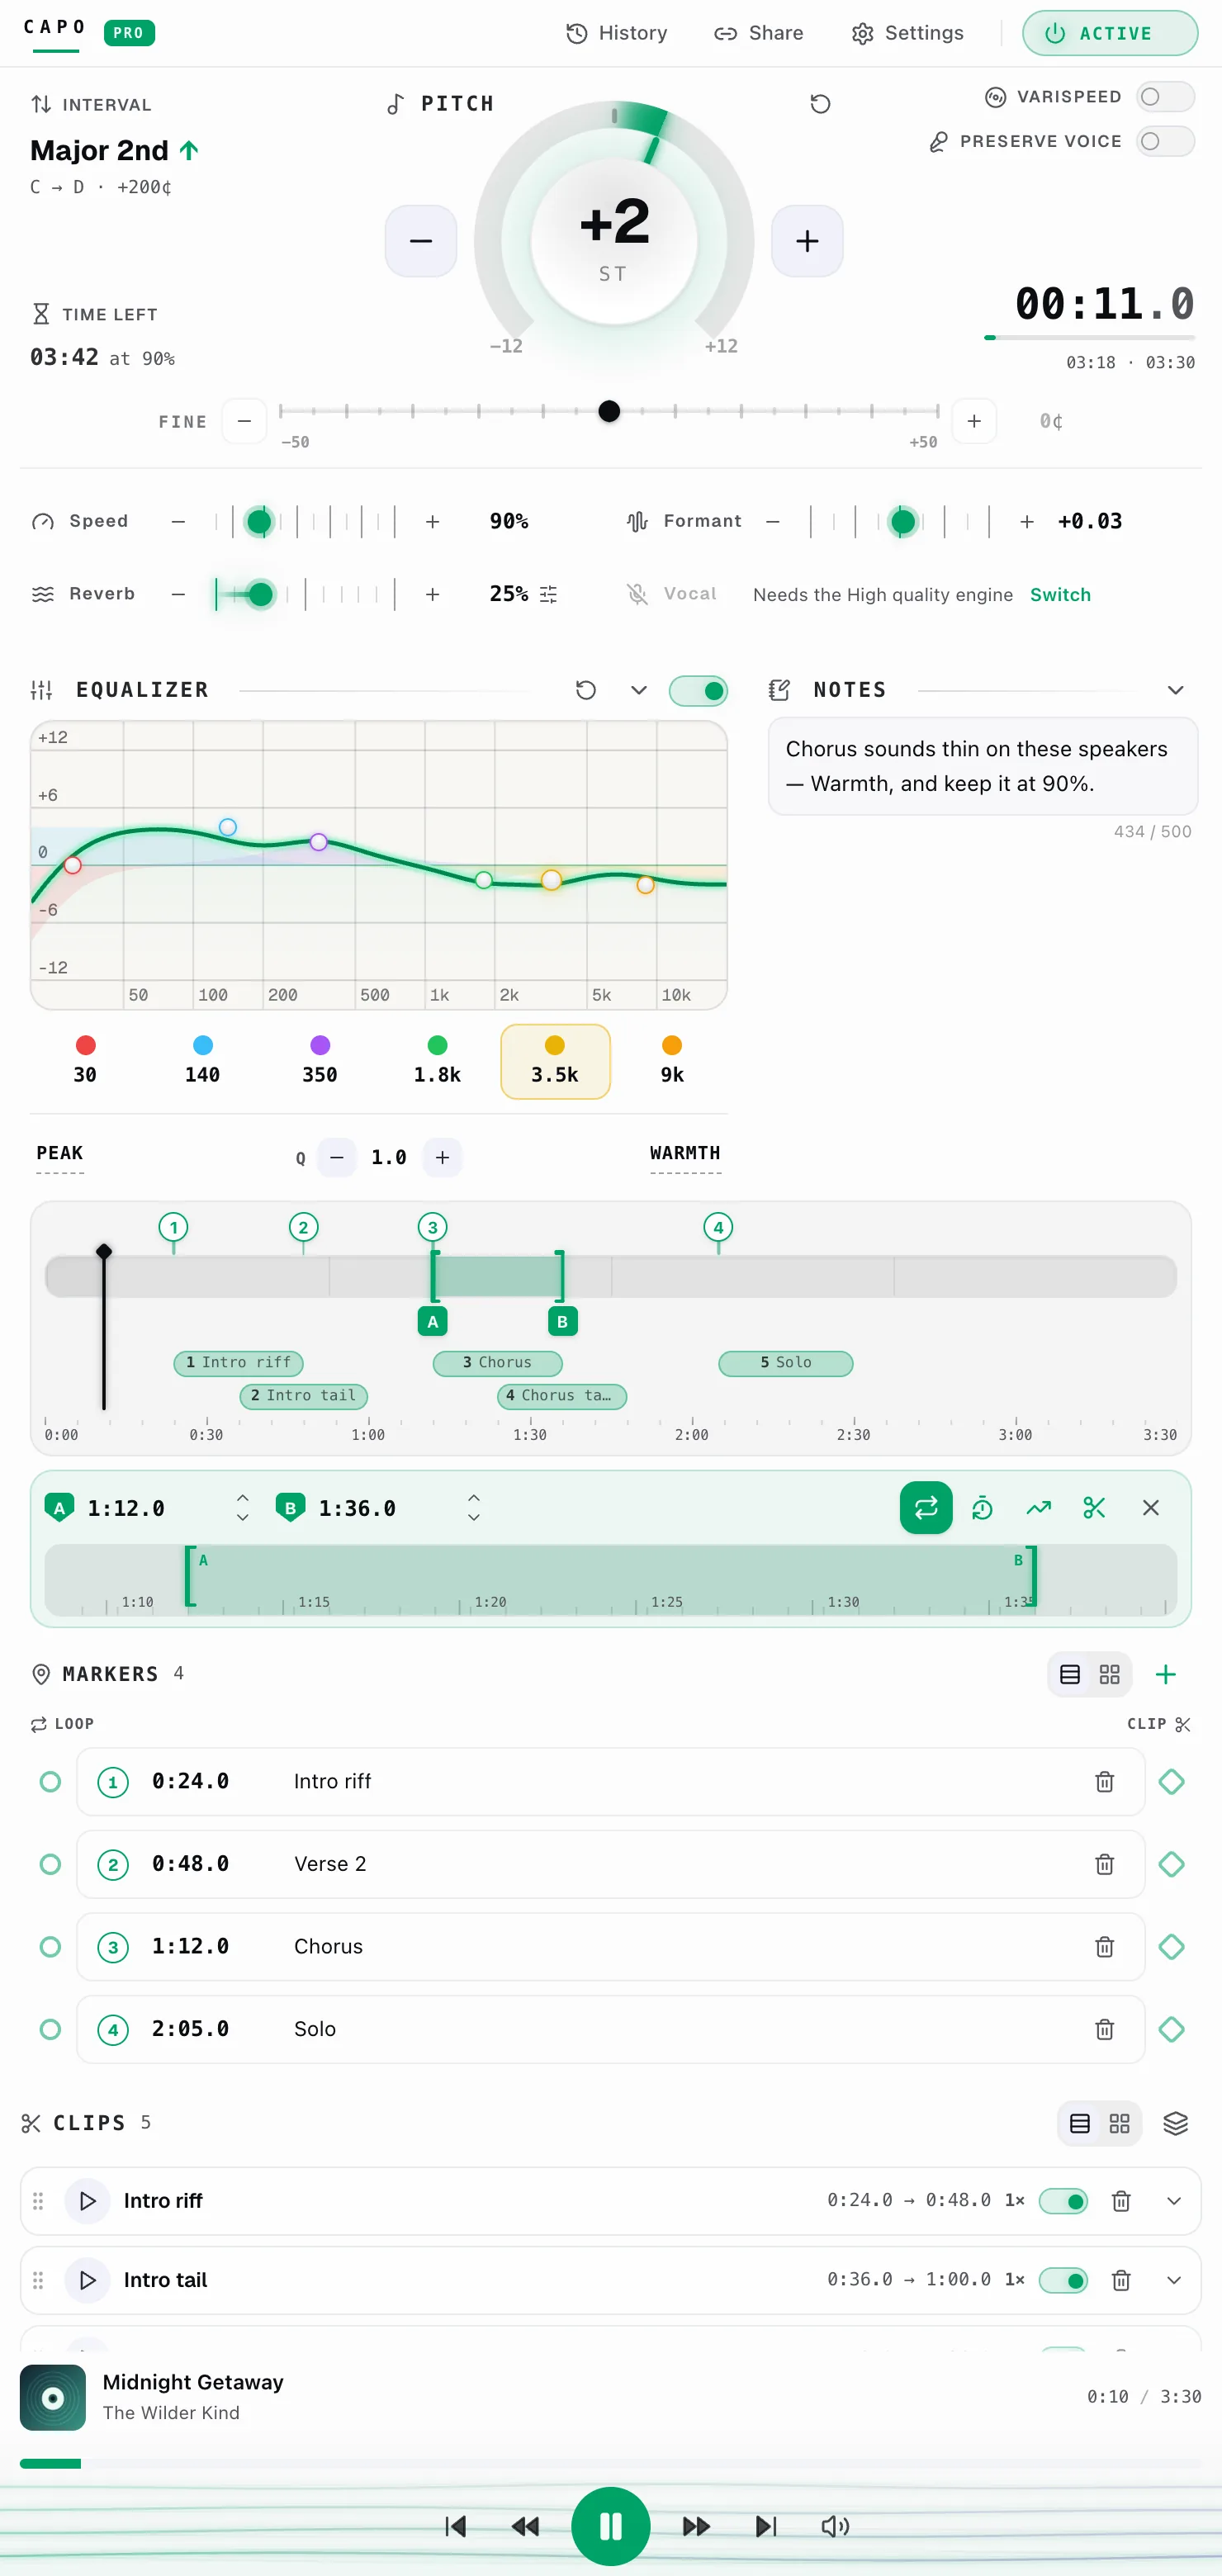
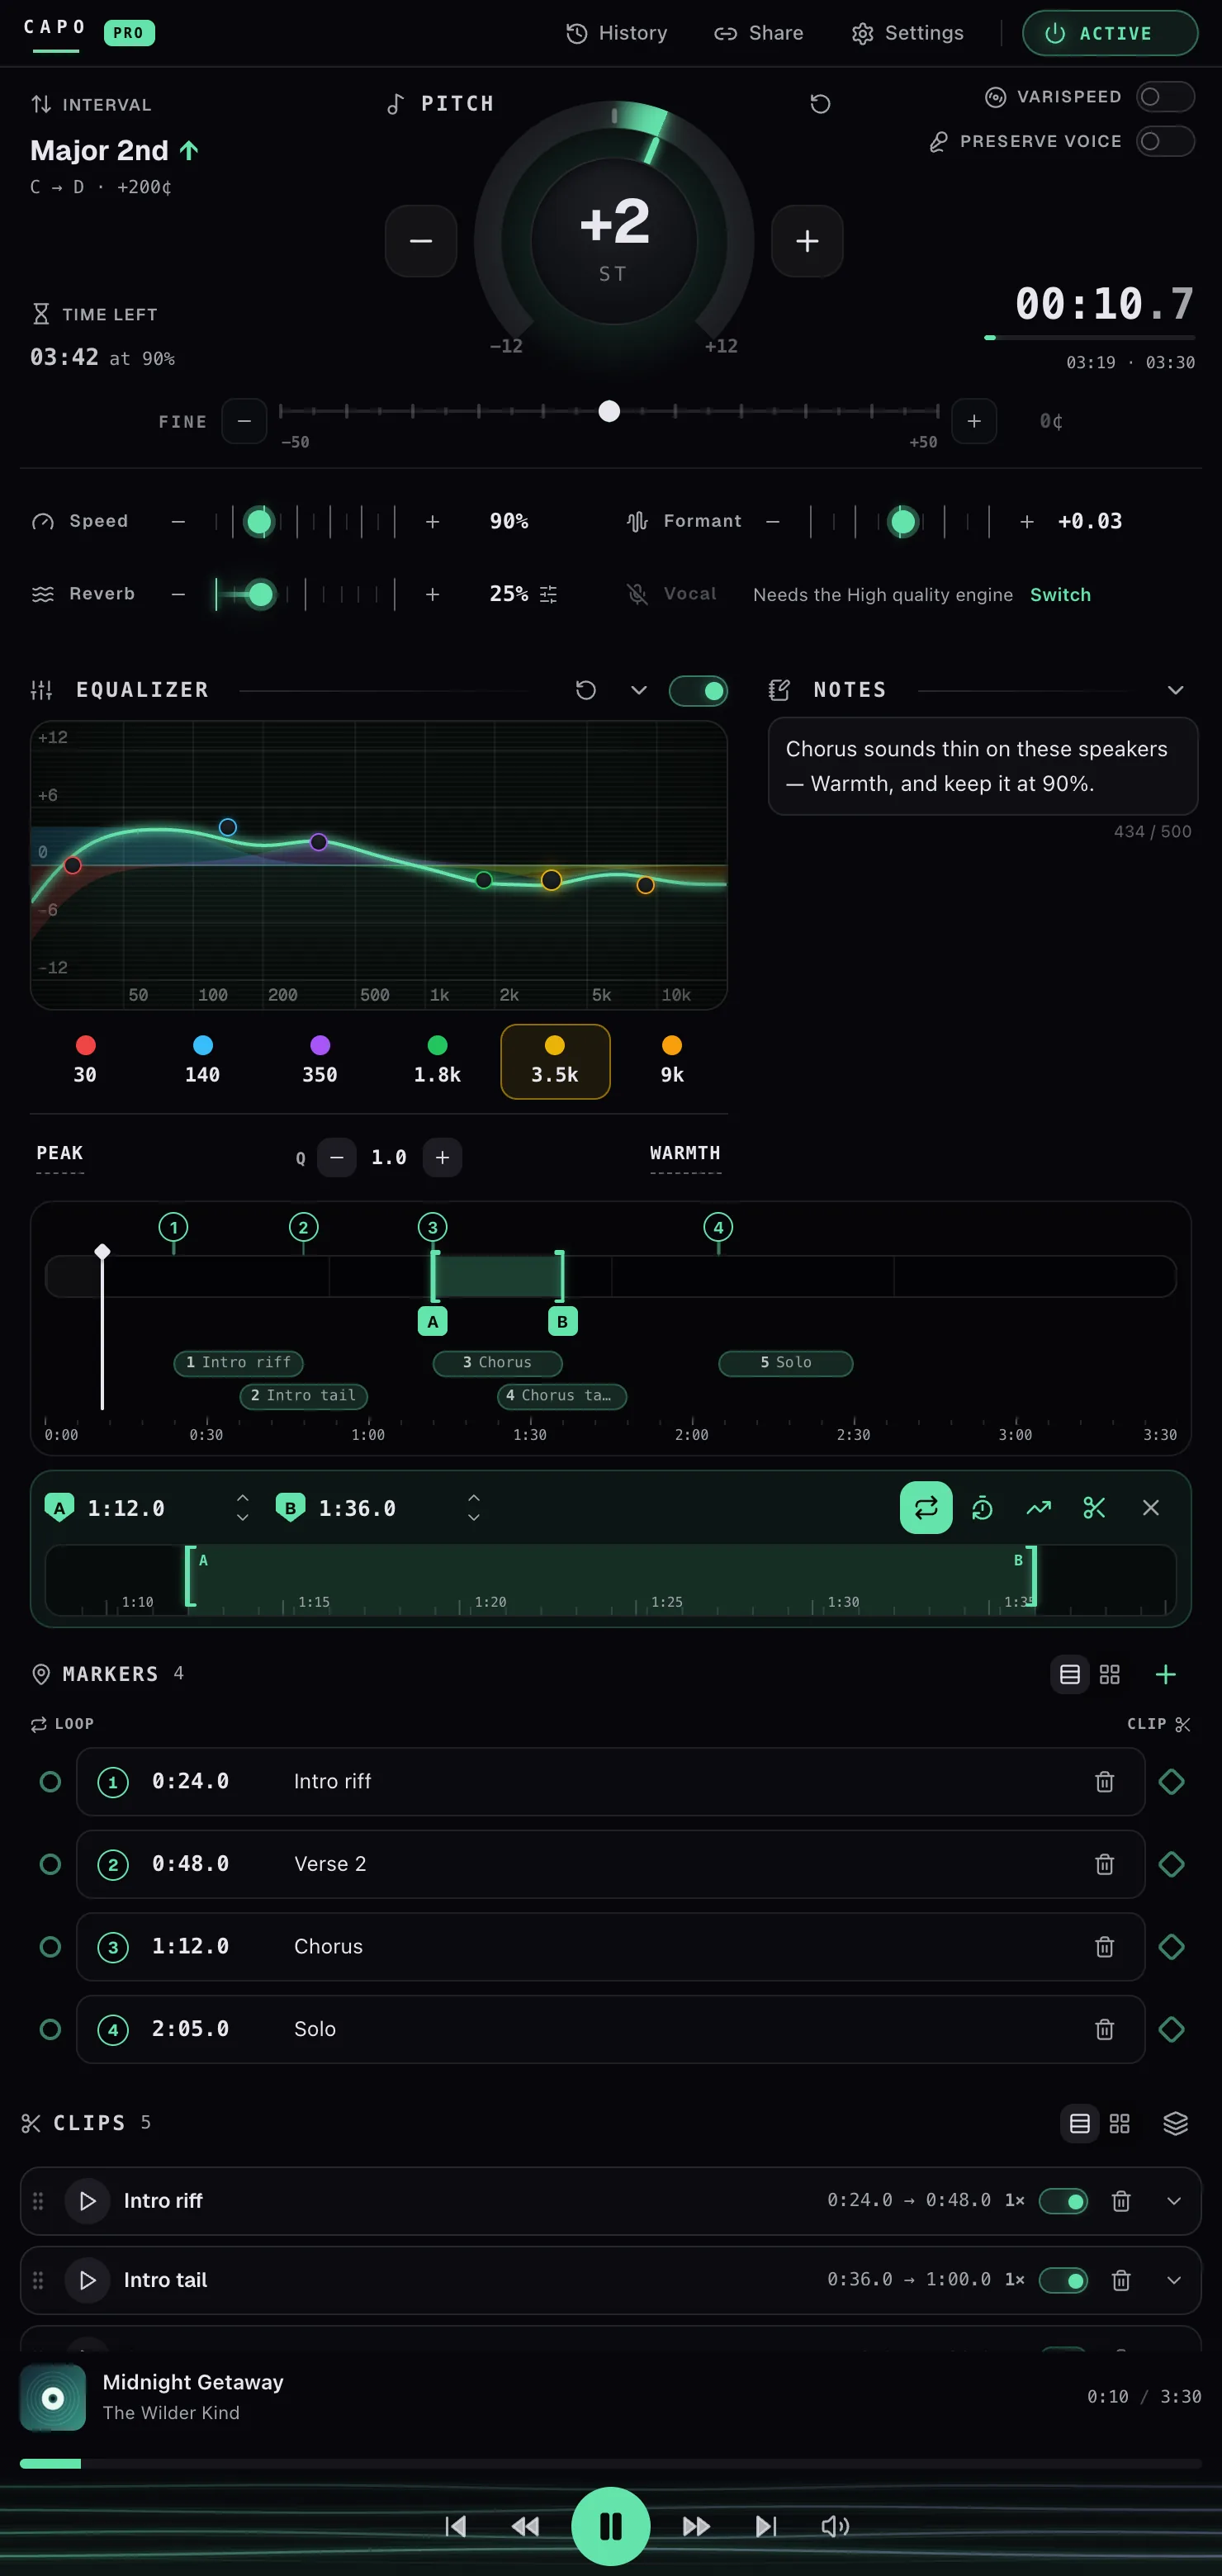
The free Capo is for adjusting playback — nudge the pitch, slow a passage, set a quick A–B loop, and get back to the video. Capo Pro is for practising. It turns that little popup into the Capo Workspace: a full practice desk that opens in your browser’s side panel and stays open beside the page while you work, instead of closing the moment you click back into the video.
Everything the free popup does comes with it. What Pro adds is the set of things you only reach for once you are drilling a piece rather than just listening to it — and it falls into three:
Same in both: pitch (semitones and fine cents), speed, volume, a single A–B loop with count-in, per-track saved settings, History, Settings and keyboard shortcuts.
Only in the workspace:
- Markers — up to 50 named points per track, with jump-to shortcuts.
- Clips — up to 50 saved sections, each with its own repeat count and its own pitch, speed, formant and reverb, plus a “loop all clips” sequence.
- Equalizer — 6 bands, ±15 dB, with filter types, Q, and presets grouped as Tonal, Voice and Mix.
- Formant, Reverb (with size, damping and pre-delay) and a Vocal reducer (with intensity, focus, frequency range and stereo balance).
- Varispeed and Preserve voice.
- Speed trainer — ramps a loop from a start speed to a target in steps.
- Notes — up to 500 characters saved with the track.
- Reference tuning, an interval readout and a session clock.
- A full timeline — scrub, drag the loop ends, and a zoomed loupe for fine placement.
The audio effects are enforced in the engine, not just hidden in the interface: without Pro, formant, reverb, varispeed, the vocal reducer, reference tuning and the equalizer are stripped back to their defaults before any sound is processed.
It is one surface, not a pile of buttons — the markers, the loop, the clips and the trainer all feed each other. What is the Capo Workspace? walks through how they fit together.
The free toolbar controls stay free forever — Pro is the upgrade that adds the workspace. Try it with a 7-day free trial, subscribe monthly or yearly, or pay once for a lifetime licence; see How much does Capo Pro cost, and how do I get it? for the plans and How do I sign in and turn on Capo Pro? to switch it on.
How much does Capo Pro cost, and how do I get it?
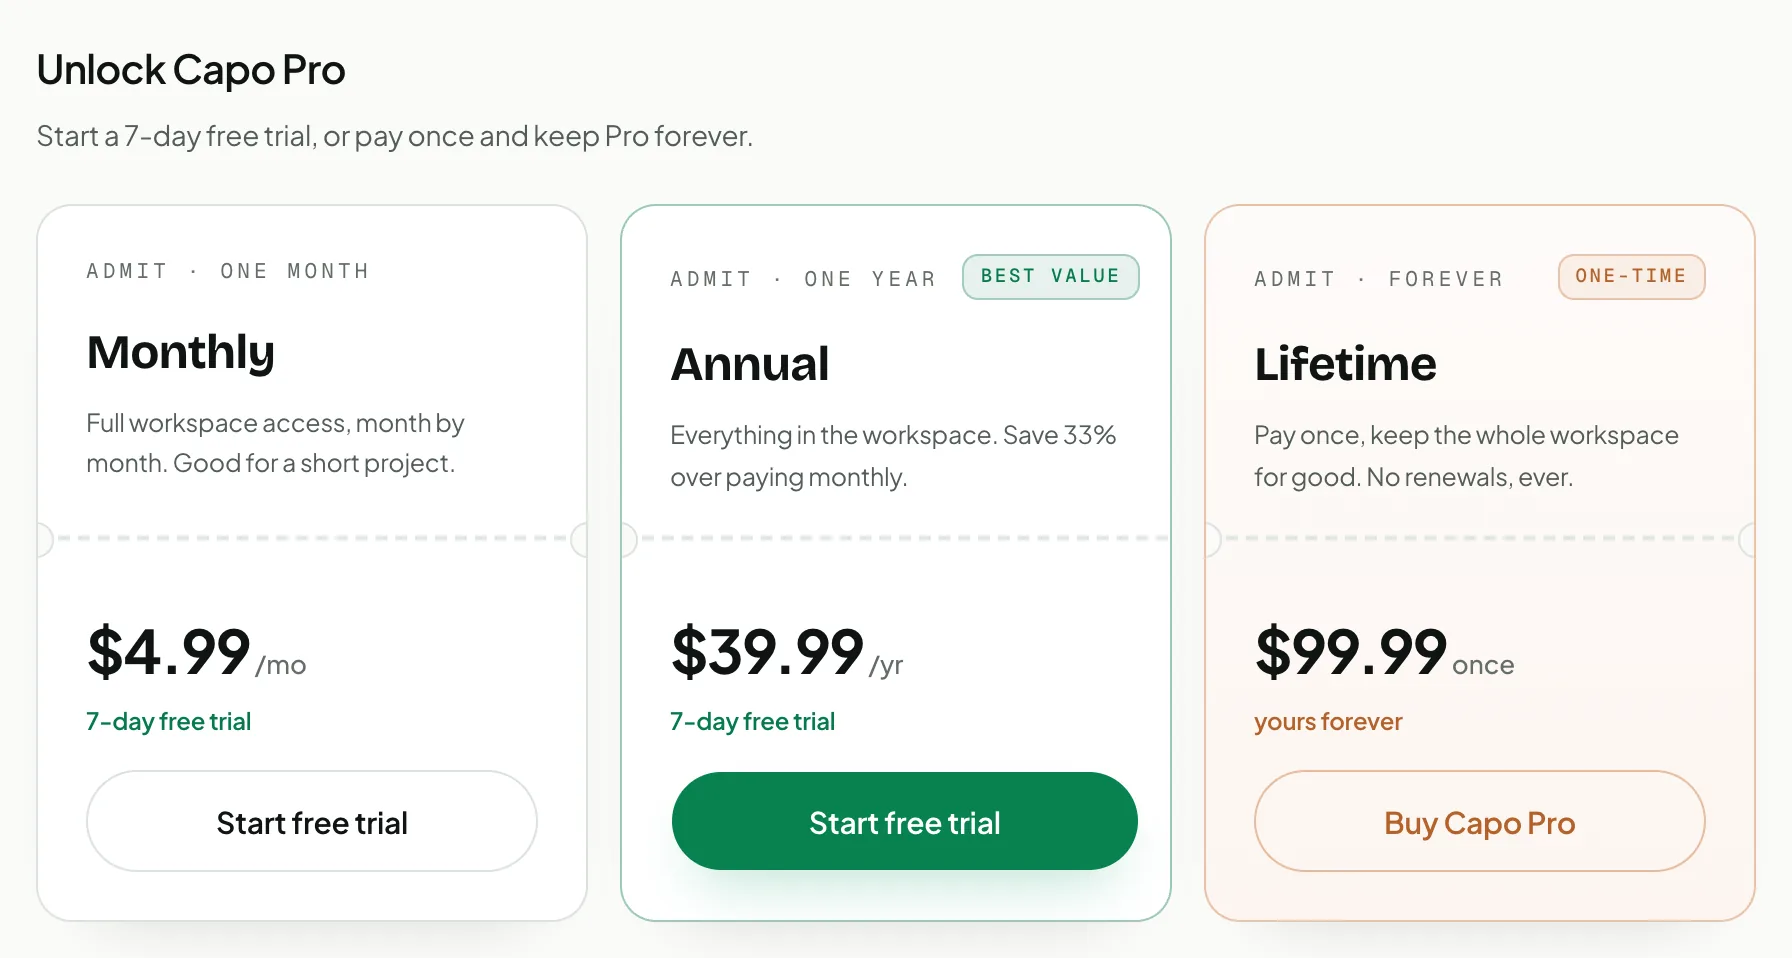
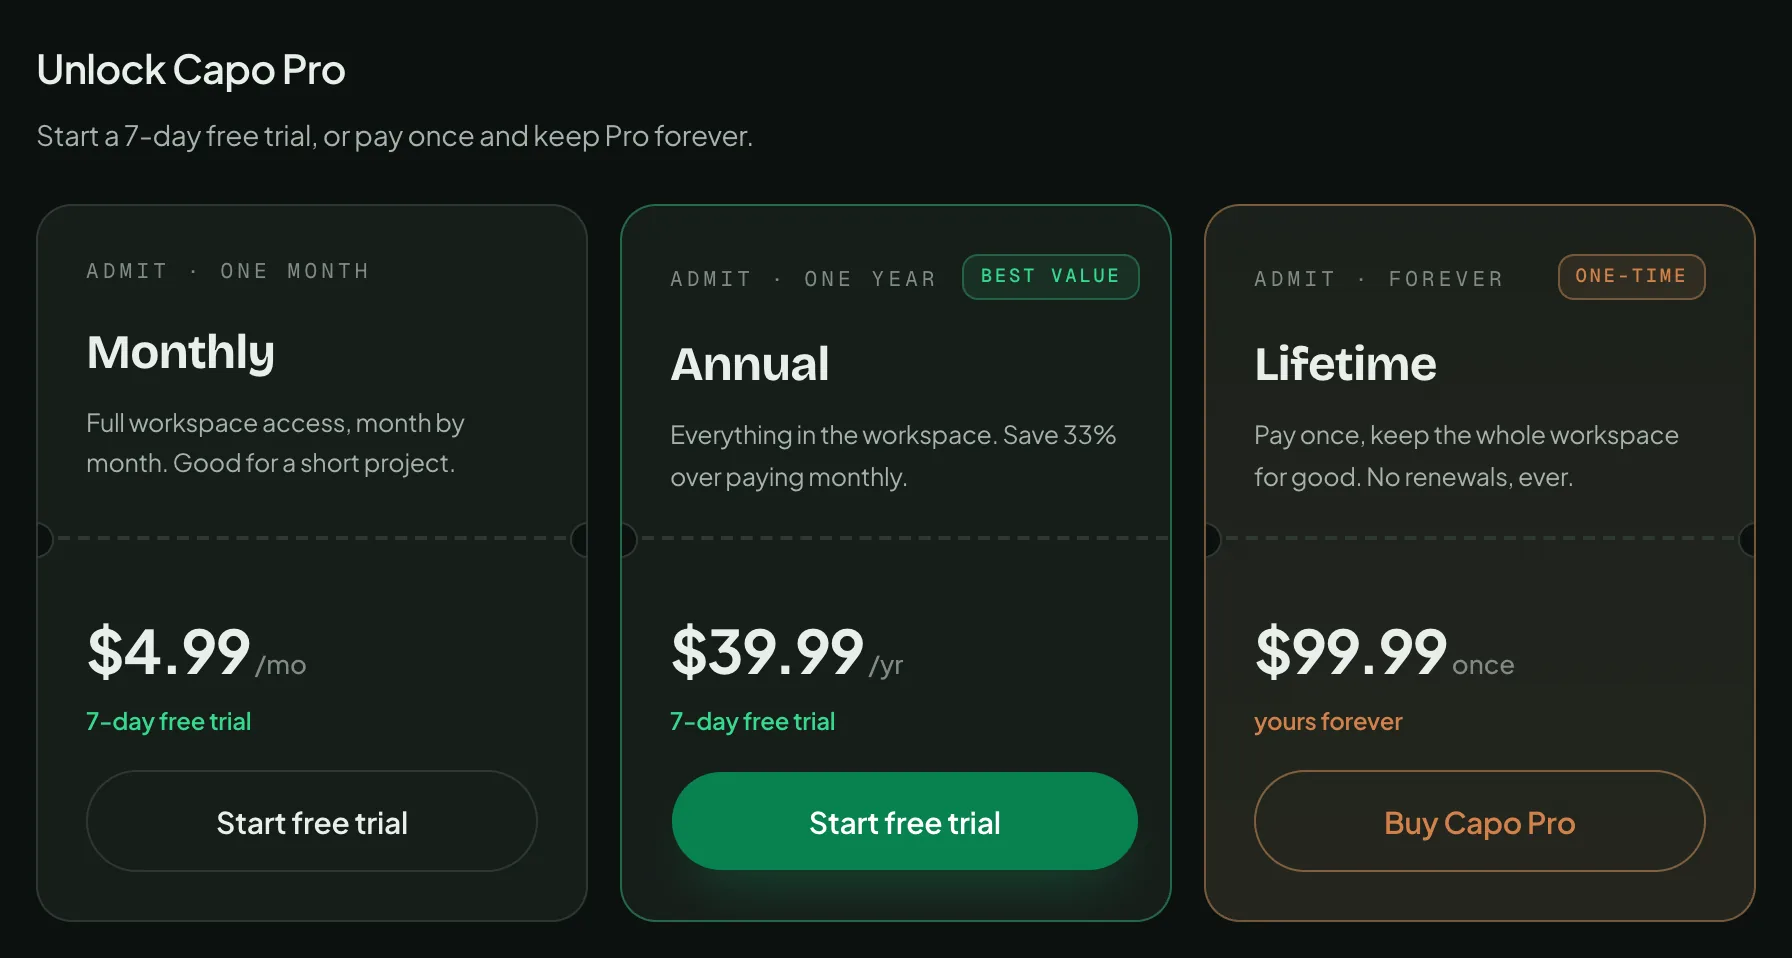
Three plans — $2.99 a month, $24.99 a year, or $49.99 once for life — and both subscriptions start with a 7-day free trial.
Monthly is full workspace access, good for a short project. Annual saves about a third over paying monthly — the best value. Lifetime is a single payment with no renewals, ever. Prices show in your local currency, so your total may differ from the figures above.
To get it: open the pricing page on capotune.com, or tap Start free trial / Buy Capo Pro from Capo’s upgrade prompt, and pick a plan. Then sign in to Capo with the same account and the workspace unlocks — see How do I sign in and turn on Capo Pro?. The free toolbar controls stay free either way; see also What is Capo Pro?.
Finding it: each card’s button is Start free trial (Monthly and Annual) or Buy Capo Pro (Lifetime); the dashed tear-line separates the plan from its price.
How do I sign in and turn on Capo Pro?
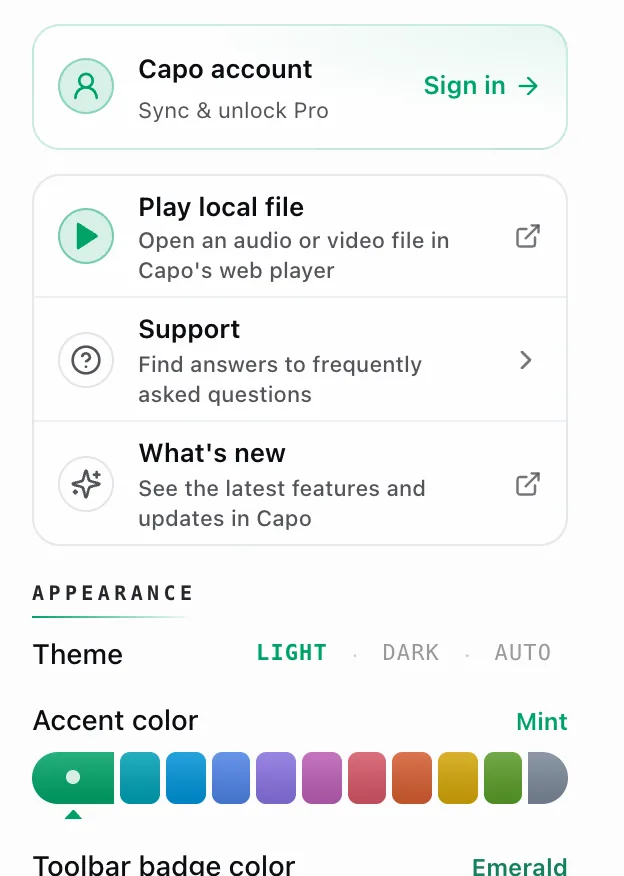
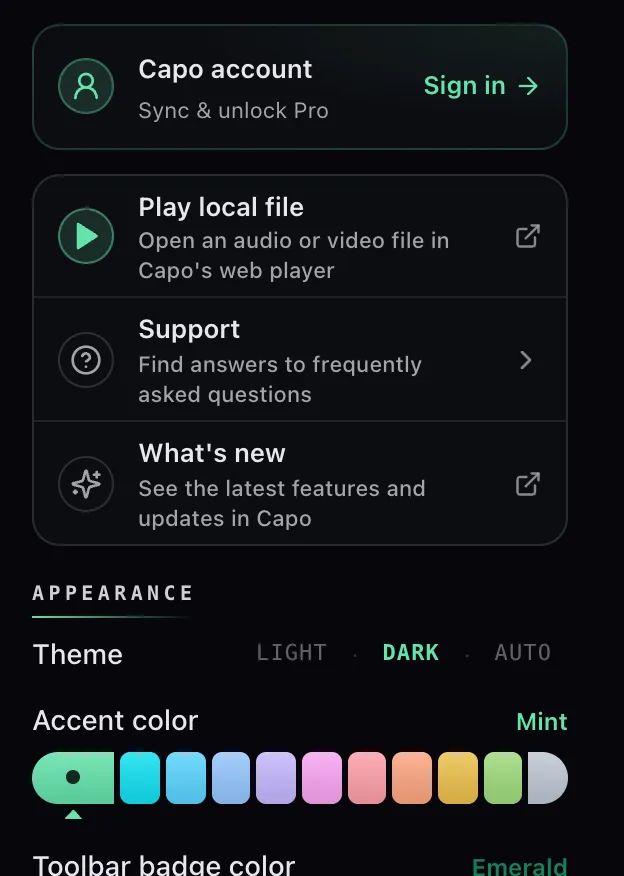
Open Capo’s Settings and use the account card at the top: tap Sign in, and once you’re signed in on Pro the whole workspace switches on.
Open Settings from the gear icon (or the side panel). The account card sits right at the top. Signed out, it reads Capo account · Sync & unlock Pro with a Sign in button; tap it and Capo opens capotune.com to sign you in, then drops you back with your email showing.
Once you’re signed in on Pro, the card shows your plan — here Pro · Lifetime — with a Manage link, and the side-panel workspace (markers, clips, the equalizer, the speed trainer) unlocks across every browser you sign in to. Not on Pro yet? The card shows Start free trial instead — one tap begins your 7-day trial. See How much does Capo Pro cost, and how do I get it?.
Signing in on another browser or computer switches Pro on there too — it’s your plan that travels, not your data. Markers, clips and saved tracks live locally in each browser and never leave your device. If something looks out of date on a second browser, open the account card so it revalidates, then reload the tab.
Use the Manage link on the account card — it opens your billing on capotune.com.
From there you can update payment, switch plans, or cancel; cancelling stops the renewal and Pro stays on until the end of the period you’ve paid for. A Lifetime licence has nothing to renew. See What happens to my Pro settings if my subscription lapses?.
Tap the sign-out icon on the account card at the top of Settings.
It sits next to your email; Capo asks you to confirm so you don’t do it by accident. Signing out returns the extension to the free popup on that browser — your saved markers and clips stay right where they are, locally in that browser, and signing back in unlocks them and the workspace again.
Finding it: the Sign in button sits at the right of the account card, which is the first thing in Settings.
What happens to my Pro settings if my subscription lapses?
Nothing is deleted. Your markers, clips, notes, EQ curve and every effect setting stay exactly where they are — Capo simply stops applying the Pro ones. Resubscribe and they come back.
What changes the moment the entitlement lapses:
- The effects stop mid-playback, not at the next track. Formant, reverb, varispeed, preserve voice, reference tuning and the vocal reducer return to neutral on every open tab at once.
- The equalizer switches off but keeps your curve.
- Clip playback is disarmed, so a looping clip cannot keep running with the panel gone.
- The toolbar button goes back to the popup, and the panel shows the locked screen.
One setting is genuinely rewritten rather than just ignored: Audio quality drops from High to Med, because High is the Pro engine. The picker then honestly shows Med instead of claiming a mode you are not getting.
The gate lives where the sound is made, not just in the panel — so a saved track, a shared link or a keyboard shortcut cannot slip a Pro effect past it. That is also why your data is safe: it was never the thing being blocked.
Why does the side panel say "Capo Workspace is a Pro feature"?Free
Because you opened the panel without Pro on your account. The panel itself stays available to everyone — what is behind it does not.
Capo only points the toolbar button at the side panel for Pro accounts. On a free account that button still opens the popup, so the usual way to land on this screen is opening Capo from Chrome's own side-panel picker, which lists every extension that offers a panel regardless of plan.
The screen tells you where the free controls are and offers one action: Start free trial — 7 days free, cancel anytime — which opens the upgrade flow on capotune.com. Reached it by accident from Chrome’s panel picker? Just close the panel; nothing changes until you go through checkout.
Your free controls are unaffected. Close the panel and click the Capo icon; pitch, speed, volume and the A–B loop all work exactly as before.
What is the Capo Workspace?
123456789Capo Pro is the plan; the Workspace is what it opens. It is Capo in a side panel — everything the popup has, plus the practice modules — laid out top to bottom so the whole piece is in front of you at once, and it stays open while you use the page rather than closing when you click back into the video.
The screenshot is a real session, not an empty panel: a loop is set, four markers are down, five clips are cut, and the equalizer is dialled in — so you can see how the parts work together. Reading down:
- 1Top bar — History, a Share link that carries your pitch, speed and loop, Settings, and the master on/off pedal reading ACTIVE or BYPASSED. The PRO badge by the wordmark says the panel is unlocked.
- 2Pitch — the semitone dial and a fine-cents slider, the Varispeed and Preserve voice switches, and a running position clock to their right.
- 3Speed, Formant, Reverb, Vocal — four console strips. Reverb and Vocal each open a shape panel with their own controls; a greyed strip (Vocal, here) is one your audio-quality setting has not switched on — see Why is the Vocal control greyed out?
- 4Equalizer and Notes, side by side once the panel is wide enough. Here the EQ is on with the Warmth preset and six bands sitting on a live response curve, and the note reads back the plan for the session — both saved with the track and waiting the next time you open it.
- 5Timeline — the heart of the panel. The shaded mint band is your loop, the numbered pins are your markers, and the bar underneath is a clip; the vertical line is the playhead. Nothing new lives here — it draws what the loop, marker and clip lists below hold, so you can see them all against the song at once.
- 6Loop card and loupe — the same loop again, now as typed A/B timecodes plus a zoomed strip for placing the ends exactly. Its row of buttons is where a loop turns into something else: toggle it off, add a count-in, hand it to the speed trainer, or press the scissors to cut it into a clip.
- 7Markers — the list, with a Loop rail down its left edge and a Clip rail down its right; either one turns a marker into the starting point of a loop or a clip.
- 8Clips — the saved sections, each with a play button, a repeat count, an on/off switch and its own effects.
- 9Footer — what is playing, a seek bar, the transport, and the volume fader, which lives down here in the workspace rather than up among the strips.
So the four lists are not separate tools bolted together: a marker becomes a loop, a loop becomes a clip, and every one of them shows up on the same timeline. That is the whole difference from the popup — the popup adjusts the sound, the workspace lets you take a song apart and put the hard parts on repeat.
Drag the panel's inner edge and watch for these:
- 500px — the equalizer moves beside Notes.
- 520px — the PRO badge appears in the header.
- 640px — the header buttons grow text labels, and the power button starts spelling out ACTIVE or BYPASSED instead of showing the glyph alone.
- 660px — the console strips go two-up.
- 700px — the dial gains a left-hand wing. This is the big one.
That wing is the only place the interval readout and the session clock exist. Below 700px they are not collapsed or hidden behind a chevron — they are simply not rendered, so there is nothing to go looking for.
Remember the wing shows one or the other: reference tuning if you have switched it on in Settings, otherwise the interval readout and session clock.
These thresholds measure the panel, not your screen — so a wide monitor with a narrow panel still gets the narrow layout. If you want everything at once, drag the panel wider rather than moving the window.
How do I open the workspace?
With Pro active, clicking the Capo toolbar icon opens the workspace instead of the popup. Nothing else to turn on.
Capo decides which surface the toolbar button opens based on your plan: for a Pro account it clears the popup and tells Chrome to open the side panel on click; for a free account it puts the popup back. That switch re-runs whenever you sign in or out, so the button always matches your current plan.
You can also open it the way you open any side panel — from Chrome's side-panel button in the toolbar, and pick Capo from the list.
Two things worth knowing:
- The panel follows your active tab. Switch to a tab with nothing playing and it shows “Nothing's playing yet” — it is now watching that tab instead.
- On Firefox, open it from the sidebar instead. The workspace ships there as a normal Firefox sidebar — what Firefox lacks is the API that lets the toolbar button open it for you, so the button keeps showing the popup and you pick Capo from the sidebar list.
Drag the panel's inner edge to make it wider. Past about 500px the equalizer moves beside Notes, past 660px the console strips go two-up; and the widest layout gives the dial a left-hand wing — carrying reference tuning if you have switched it on, otherwise the interval readout and session clock. It is one or the other, never both.
Can I leave myself notes on a track?
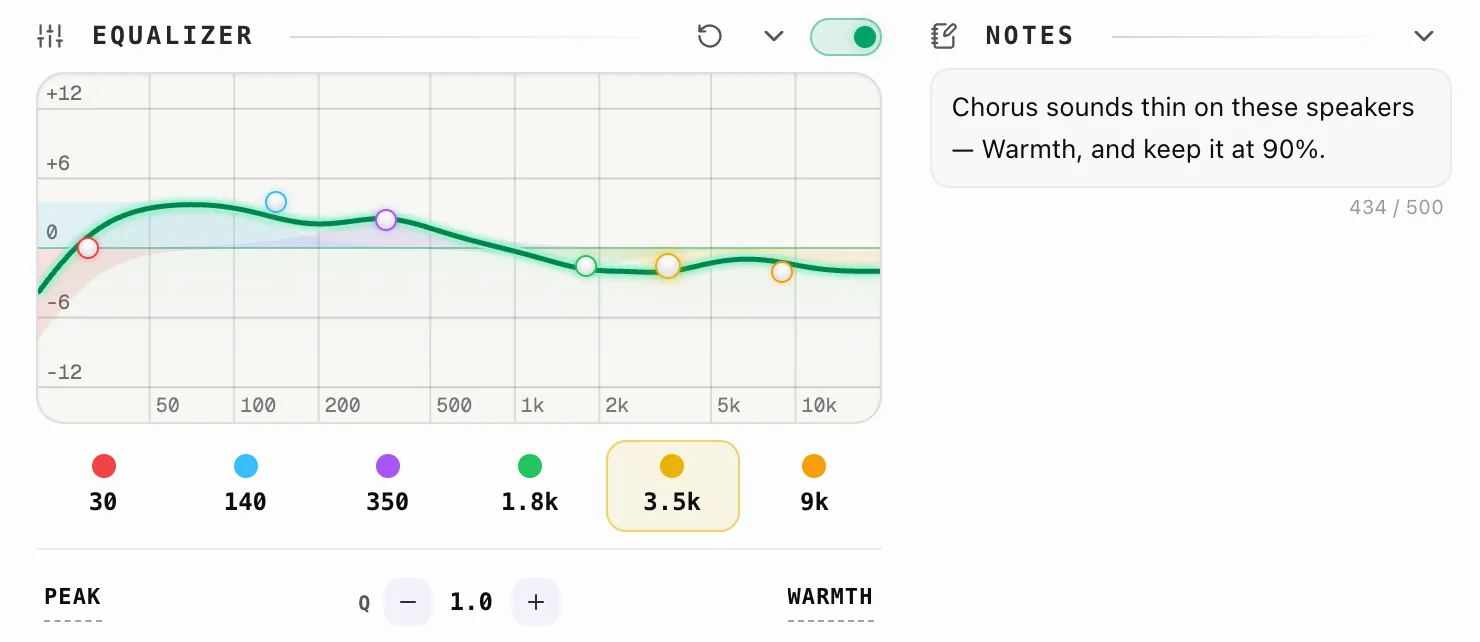
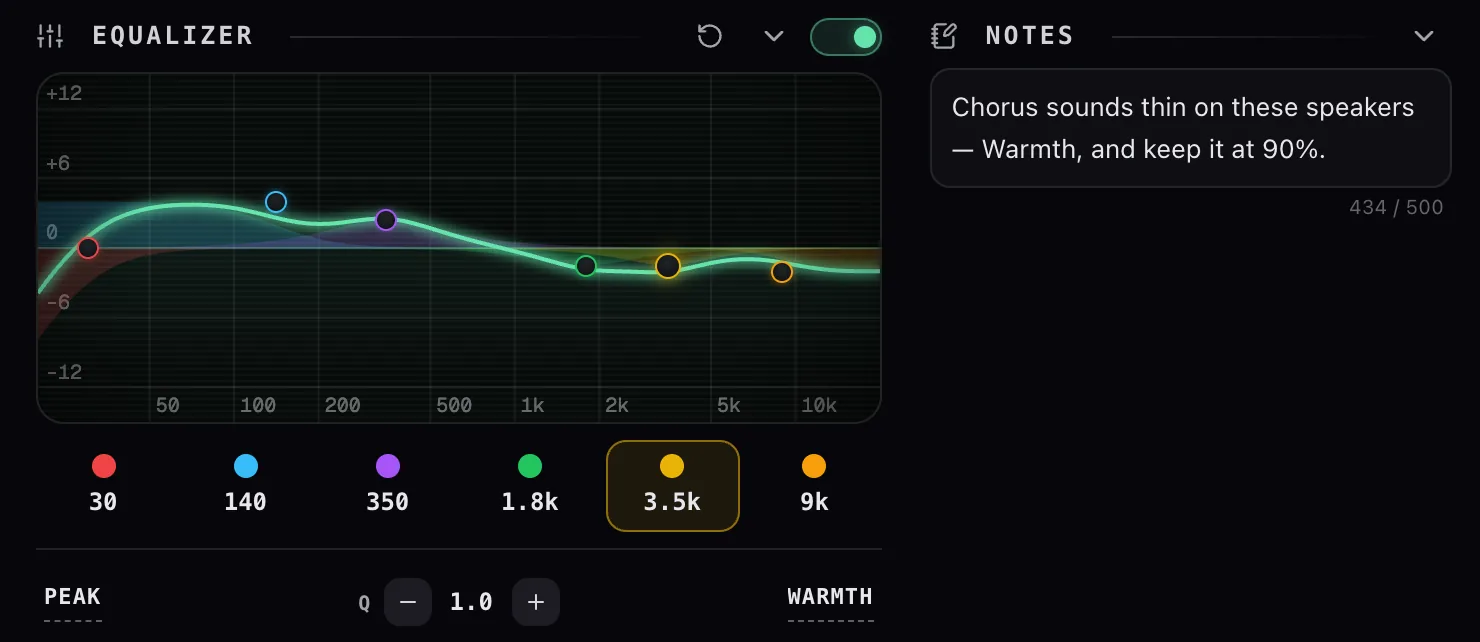
Yes — the Notes box in the workspace saves a note against the track you are on, and it comes back the next time you play it.
Type into “Add a note for this track…” and it grows as you write, up to 500 characters; the counter turns amber as you approach the limit. The chevron collapses the box.
The note rides along with everything else Capo remembers for that track, so it lives on the same per-track entry as your pitch, speed and loop — no separate list to manage, and nothing leaves your browser.
If nothing is playing yet the box tells you so rather than saving a note with nowhere to attach it.
Does the workspace add keyboard shortcuts?
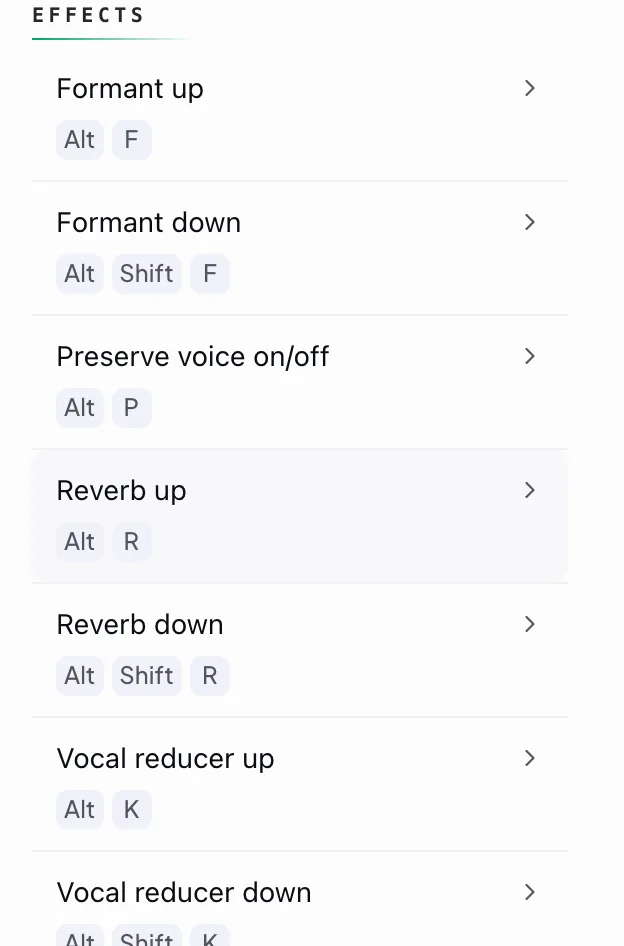
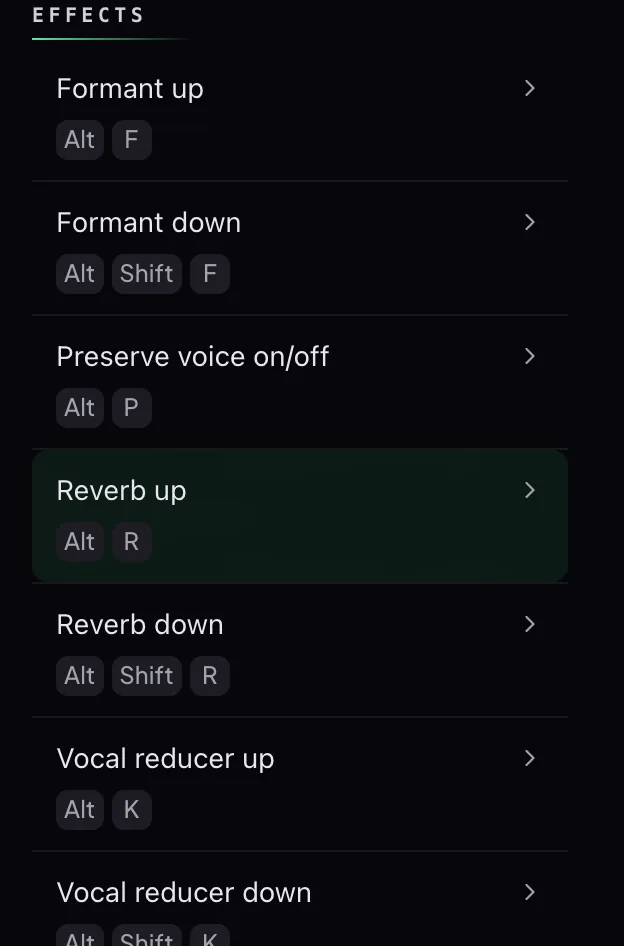
Yes — two whole categories of them, listed on the shortcuts screen under EFFECTS and MARKERS. Without Pro those two headings carry a PRO tag; with Pro they are simply yours.
Effects
- Alt+F / Alt+Shift+F — formant up and down
- Alt+P — preserve voice on/off
- Alt+R / Alt+Shift+R — reverb up and down
- Alt+K / Alt+Shift+K — vocal reducer up and down
- Alt+T — varispeed on/off
Markers
- Alt+M — add a marker at the playhead
- Alt+1 to Alt+9 — jump to markers one to nine
Everything free stays where it was — speed on Alt+. and Alt+,, volume on Alt+] and Alt+[, and the loop on Alt+L, Alt+A, Alt+B and Alt+C. The full list, yours to rebind, is on the shortcuts screen itself.
Without Pro the Pro rows still appear on the shortcuts screen so you can see what exists, but pressing the keys does nothing — the check happens where the sound is made, not just in the panel.
Markers
What are markers, and how do I add one?
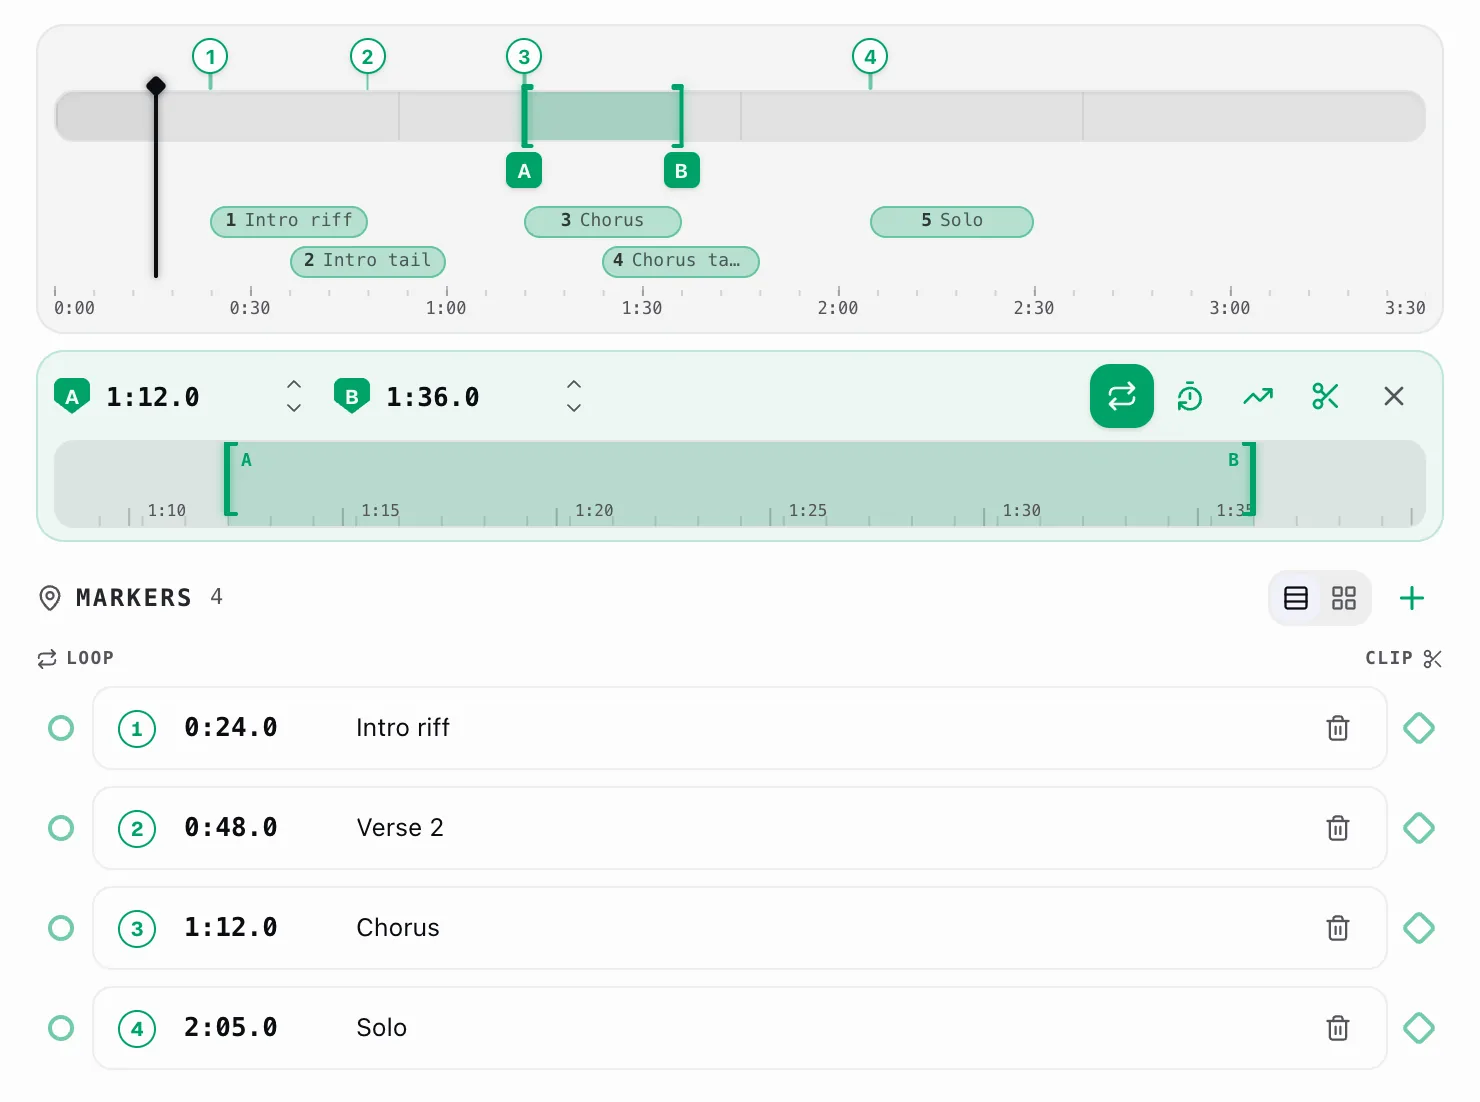
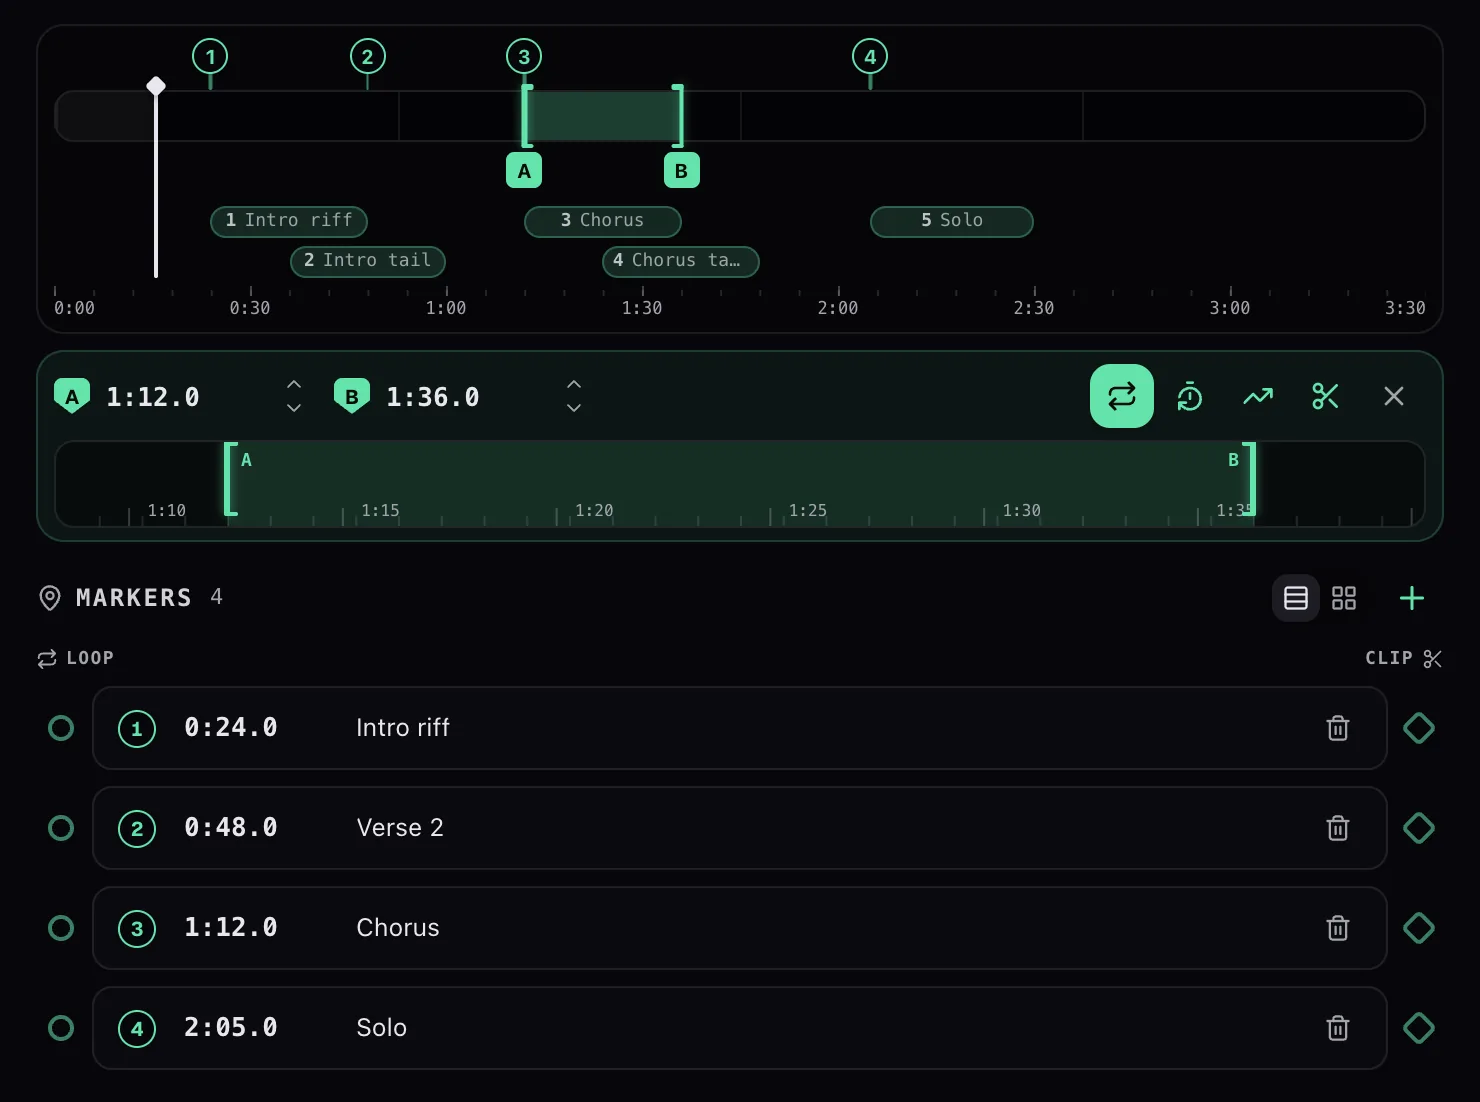
A marker is a named point in the track. Press + in the Markers row and one drops at the playhead.
Each marker appears twice: as a numbered pin on the timeline, and as a row in the list underneath. In the row you can rename it, type an exact time, nudge it, or set it to wherever the playhead is now.
The two rails either side of the list are the useful part. Loop on the left and Clip on the right turn any marker into a starting point:
- Loop from here — arms a loop that begins at that marker; pick a second marker for the end.
- Clip from here — does the same for a clip.
You can also press a marker to jump straight to it, or hold it to loop from there. Markers are numbered in time order and the first nine get a keyboard shortcut.
Each marker row is a little patch bay. On the left rail is a round Loop port; on the right is a diamond Clip port. Tap a marker’s round port and that marker is armed as the beginning of a loop — a dashed wire follows your cursor and the header reads 1 → ?, meaning “start at marker 1, end still to choose.”
Now tap the round port on a second marker. Capo sets an A–B loop spanning the two markers, switches it on, and starts repeating that stretch — the same loop you’d get from the loop card, but snapped exactly to your markers, with a solid wire linking the two. Tap the × (or press Esc) to cancel before you pick the end. The diamond ports do the very same thing for a clip instead of a loop.
Limits: 50 markers per track, and two markers cannot sit closer than half a second apart — if you are already on one, the + button tells you so rather than stacking a duplicate.
How do I rename, move, or delete a marker?
Everything is on the marker’s row in the list.
Rename: type into the name field (it shows Marker N until you do). Move: type an exact time, nudge it with the steppers, or use the pin button to snap it to wherever the playhead is now. Delete: the trash icon. Markers stay numbered in time order, so moving one past another simply renumbers them.
Clips
What are clips, and how do I make one?
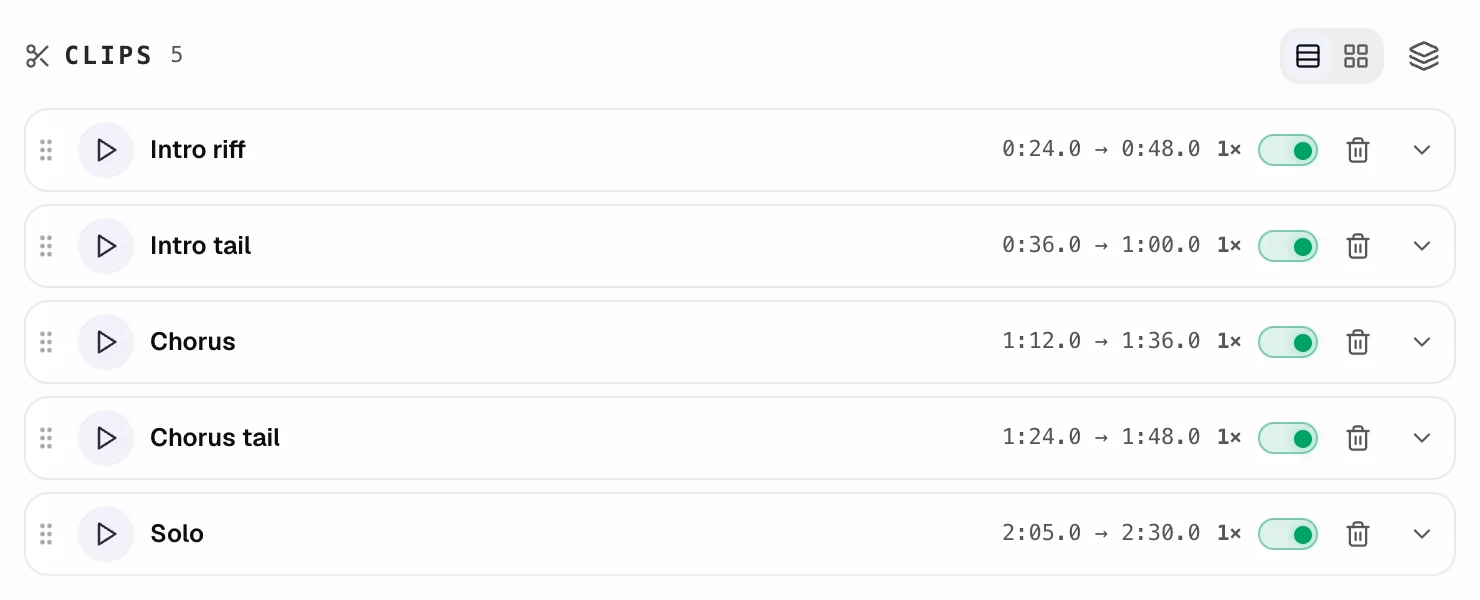
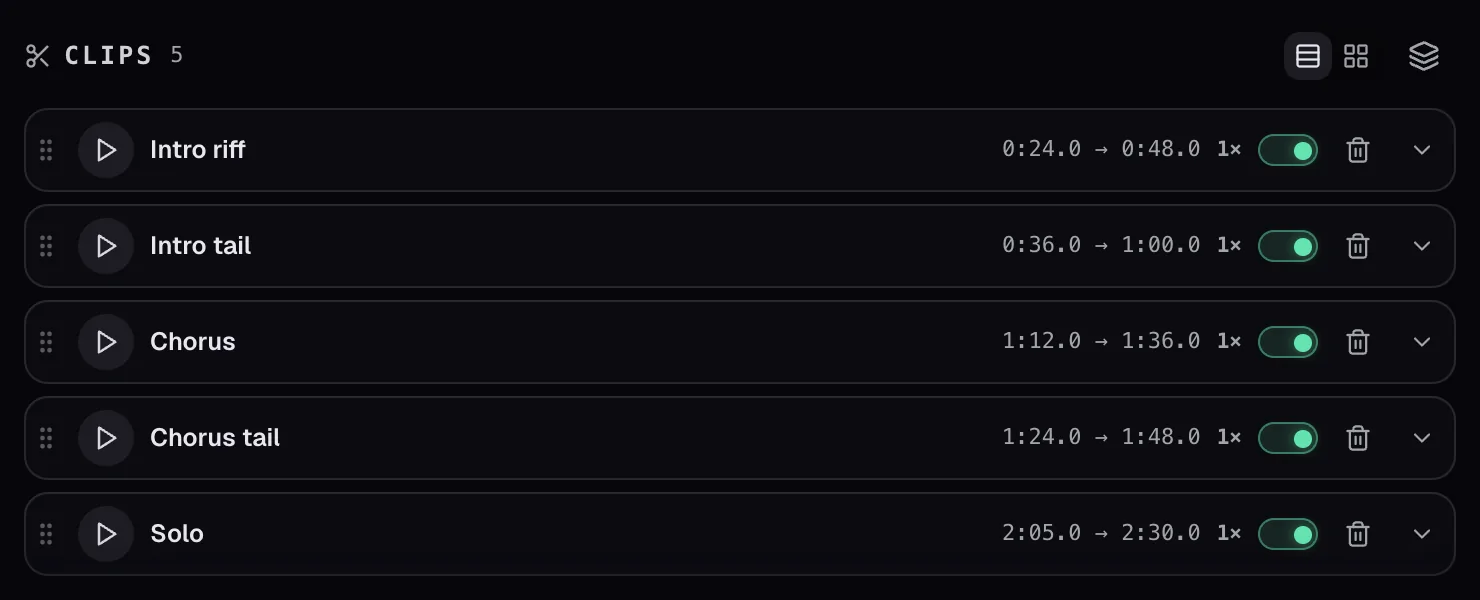
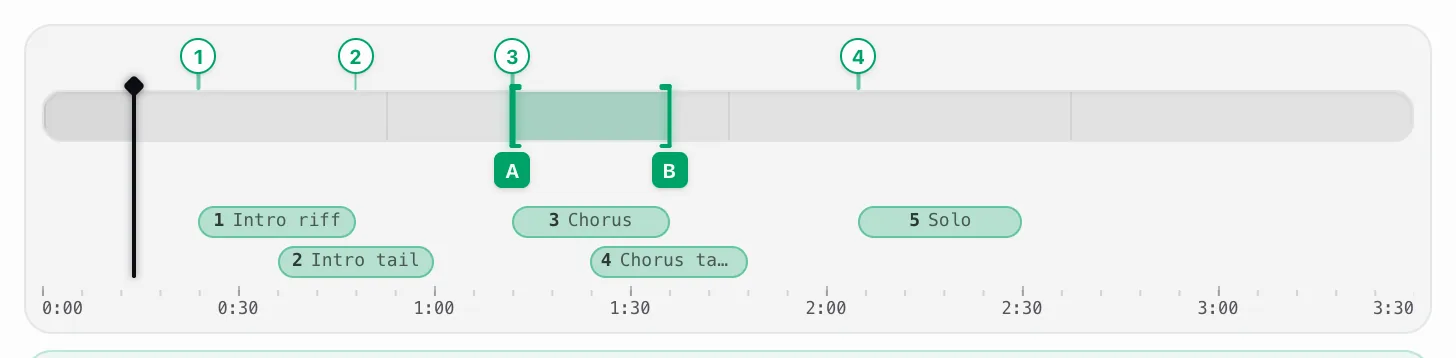
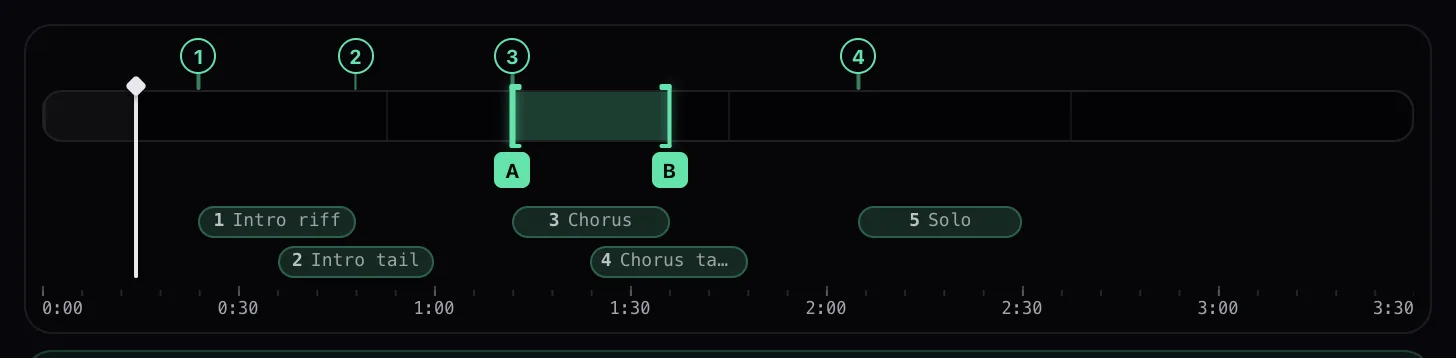
A clip is a saved section of the track that you can replay, repeat and treat differently from the rest of the song. The quickest way to make one: set a loop, then press the scissors on the loop card.
Clips show as bands under the timeline — drag them to move, and they snap to your markers and loop ends. Each row in the Clips list gives you play, a name, a repeat count, an on/off switch and a settings drawer.
On the strip above the waveform, drag the middle of a band to slide the whole clip, or grab an edge to change just that end. Both snap to nearby anchors — your markers, the loop’s A and B points, the playhead and the other clips’ edges — so you can land tidy times a raw drag never could. For an exact time, open the drawer and type it into the start/end fields.
The settings drawer is where clips stop being bookmarks:
- Repetitions — play this clip 1 to 9 times before moving on.
- Count-in and loop this clip.
- Per-clip effects — add Transpose, Pitch (in cents), Speed, Formant or Reverb that apply to this clip only. So a hard bar can run slower and a step down without touching the rest of the track.
Loop all clips plays your clips in order, back to back — a practice set built from the parts you actually need to work on. Reorder them by dragging.
Limit: 50 clips per track.
How do I give a clip its own pitch, speed or effects?
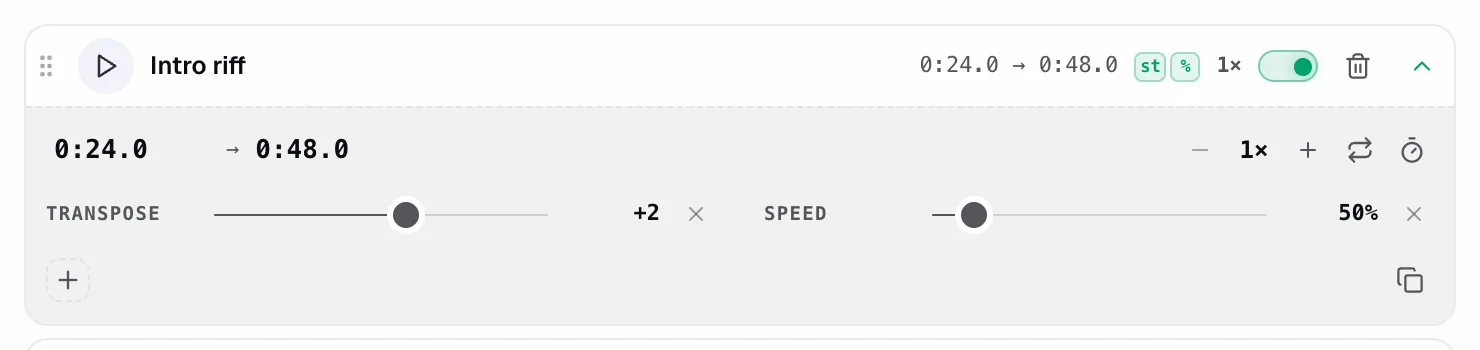
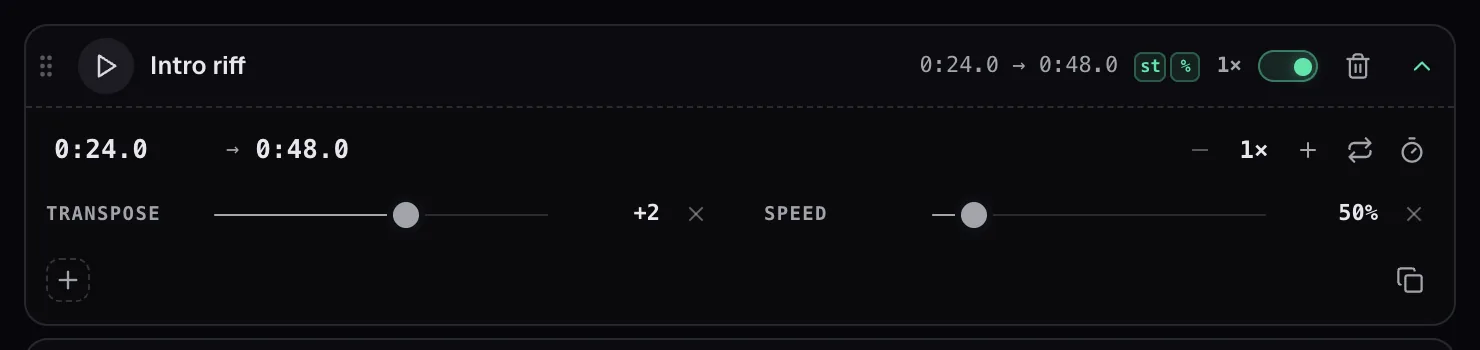
Open the clip’s settings drawer — the chevron at the end of its row — and use the little mixer inside.
Each strip is one override just for this clip: Transpose (semitones), Pitch (cents), Speed, Formant and Reverb. Drag a strip and it applies live; the × beside it removes the override so the clip falls back to whatever the rest of the song is using. The + adds another effect. So one hard bar can run slower and a touch lower while everything around it stays put.
Open the drawer (the chevron on the clip row) and use the ×N stepper: the clip plays that many times before the set moves on to the next clip. Turn on loop this clip and it repeats endlessly instead — the row then shows ∞ in place of the number. There’s also a count-in toggle that adds a short pause at the top of each repeat, the same as the loop’s count-in.
The drawer also holds the clip’s exact start and end times and its repeat count. Everything is inert while the clip’s switch is off. See What are clips, and how do I make one?.
Reading them off: st is transpose in semitones, ¢ is pitch in cents, % is speed, F is formant, and R is reverb. A badge shows up only for an effect the clip actually changes, so at a glance you can see this clip plays a little lower, or slower, than everything around it.
1× is different: it’s the repeat count — how many times the clip plays before the set moves on, from 1× up to 9× (or ∞ when it’s set to loop forever). The switch beside it turns the clip on or off in the line-up.
Finding it: the down-chevron at the right end of a clip row opens this drawer. Inside, each labelled strip — Transpose, Speed, Reverb — is one effect: drag it to set the amount, and the small × at its right clears it. The + (bottom-left) adds another effect; the overlapping-squares icon (bottom-right) duplicates the whole clip.
How do I reorder, duplicate, or delete a clip?
Drag the grip to reorder, and use the drawer for duplicate; delete sits on the row.
Reorder: drag the grip handle on the left of a clip row, or focus it and press the up/down arrow keys. Duplicate: the copy icon inside the clip’s settings drawer makes an identical clip you can nudge elsewhere. Delete: the trash icon on the row removes it. Reordering only changes the play order for the sequence — each clip keeps its own place on the timeline.
Turn on the sequence toggle in the Clips header and Capo plays your enabled clips back to back.
Each clip plays for its own repeat count, then Capo moves to the next one in the list order — a practice set built from just the bars you keep missing. Switch a clip off to skip it without deleting it, and reorder with the grips to change the running order. It’s the same engine as the A–B loop, just chained across several sections.
A clip is just a stretch of the track, so two clips can cover the same seconds. When they do, one row can’t show both — so Capo opens a second lane and drops the later-starting clip there. Here clips 1, 3 and 5 fit on the top lane; 2 and 4 overlap them, so they move down.
The lane a clip lands in means nothing on its own — Capo fills lanes left to right by start time, which is why the order reads 1 3 5 over 2 4 rather than 1 2 3 4 5. The number on each band still matches its clip in the list. Nothing is wrong; it’s only making room — space the clips so none overlap and they collapse back to a single row.
Loop
How do I loop a passage in the workspace?


Play up to the start of the passage and press Set start; play to the end and press Set end. The loop turns mint on the timeline and repeats.
The loop card then gives you the whole set of controls:
- A and B timecodes you can type into directly, each with a nudge stepper and a “set to playhead” crosshair.
- Toggle loop — leave the points in place but stop repeating.
- Count in — a short pause at the top of every pass, so you can breathe and come in on time. Its length is set in Settings.
- Speed trainer — ramp the tempo across repeats.
- Scissors — turn this loop into a clip.
- X — clear it.
Underneath sits the loupe: a zoomed strip around your loop with draggable brackets, for when the difference between a good loop and a bad one is a tenth of a second. You can also drag the A and B brackets on the timeline itself.
The whole seek bar covers minutes at a time, so nudging a loop edge by a hair is fiddly. The loupe blows up just the region around your loop and gives you big draggable brackets for A and B — drag them there to catch a passage exactly on the beat. It updates the same loop the A/B buttons and steppers control; it’s only a finer way to grab the ends.
This is the same A–B loop the free popup has — the workspace adds the timeline, the loupe, the typed timecodes and the trainer around it.
What is the speed trainer?
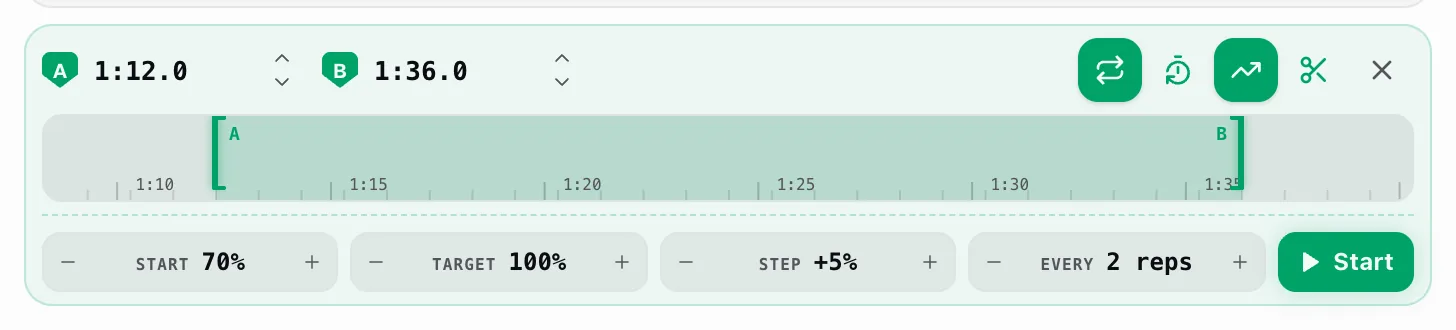
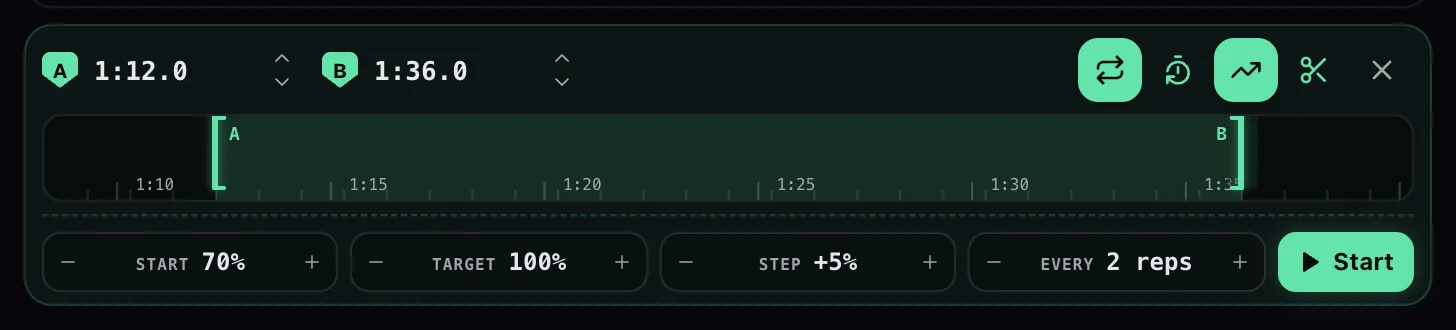
It plays your loop slowly, then speeds it up a little every few repeats until you are at full tempo — the standard way to get a passage under your fingers, done for you.
Set a loop, then press the trending-up button on the loop card. Four dials appear:
- Start — the speed of the first pass. Default 70%.
- Target — where you are heading. Default 100%.
- Step — how much faster each stage runs. Default +5%.
- Every — repeats per stage before it steps up. Default 2 reps.
Press Start and it runs. While a session is live the panel tells you what is coming next, and you can pause the ramp (the speed holds where it is), resume it, or end the session. When you arrive it says At target and keeps looping at full speed.
The dials are bounded so a session always makes sense: start from 30%, target up to 150%, steps of 1–25%, and 1 to 9 repeats per stage.
Equalizer
How do I use the equalizer?
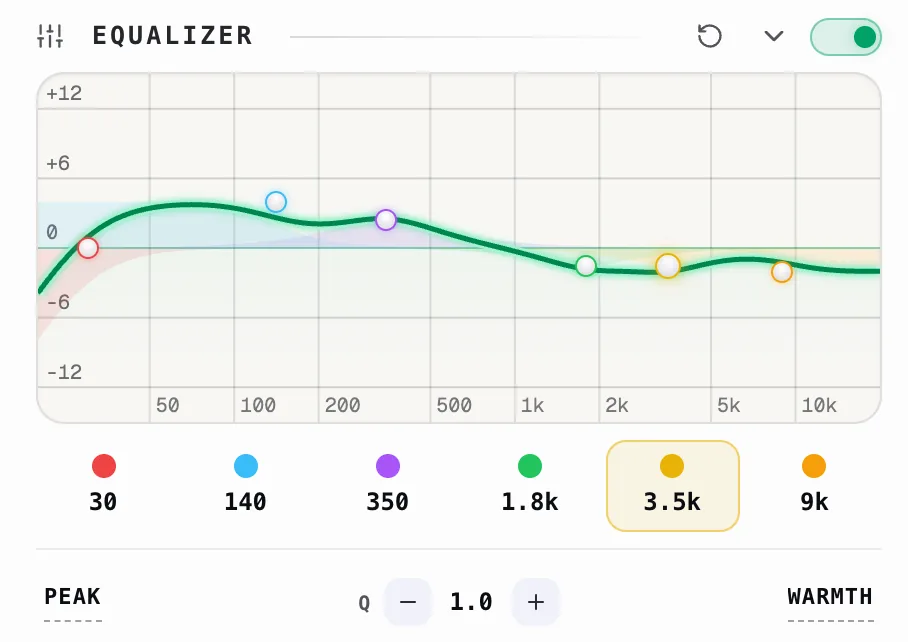
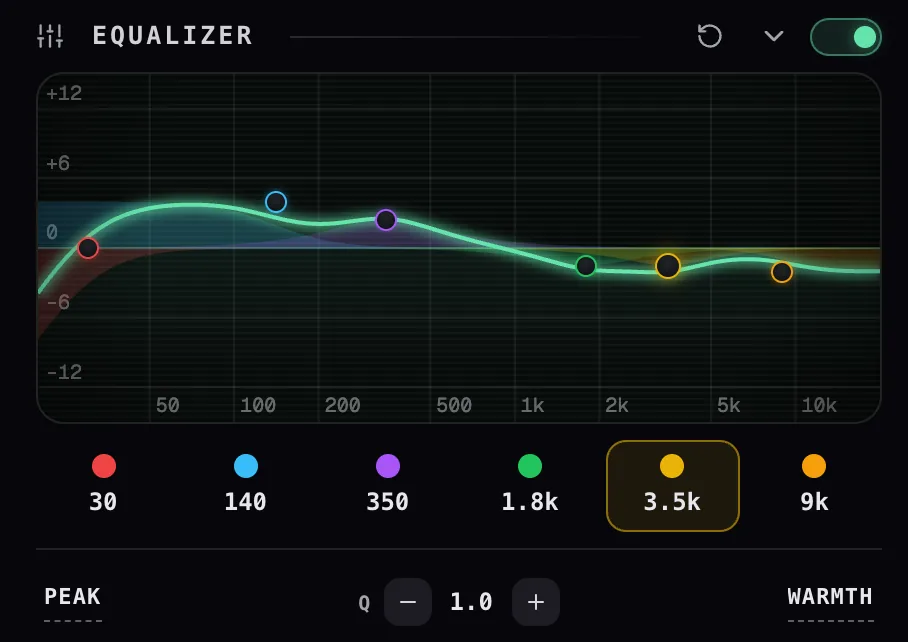
Switch it on with the toggle beside the Equalizer heading, then either pick a preset or drag a band on the curve.
There are six bands, shown as coloured dots on the response curve and as chips underneath. Select a chip and the row below it edits that band:
- Filter type — the shape that band applies, one of the six below.
- Q — how wide or narrow the band is, from 0.1 to 18.
- Drag the dot on the graph to set frequency and gain, up to ±15 dB, anywhere from 20 Hz to 20 kHz.
The six points on the curve, roughly, from Capo’s defaults:
- 30 Hz — a high-pass that trims sub-bass rumble you feel more than hear.
- 120 Hz — low bass and warmth; lift for weight, cut if it booms.
- 350 Hz — low mids; cut here to clear mud or boxiness.
- 1.2 kHz — the midrange body, where most instruments and voices sit.
- 3.5 kHz — presence and clarity; lift to bring a voice or lead forward, cut to tame harshness.
- 9 kHz — a high-shelf for air and brightness (cymbals, sparkle, sibilance).
The preset menu on the right is the fast route, grouped by what you are trying to fix: Tonal (Flat, Bass Boost, Bass Cut, Loudness, Warmth, Brightness), Voice (Speech Clarity, Presence Boost, De-Mud, Harshness Cut) and Mix (Backing Track Scoop, Mid Scoop, Treble Cut). Change anything afterwards and the menu reads Custom.
- Tonal — broad tone shaping for the whole track: Flat, Bass Boost, Bass Cut, Loudness, Warmth, Brightness.
- Voice — aimed at speech and vocals: Speech Clarity, Presence Boost, De-Mud, Harshness Cut.
- Mix — for playing along to a full song: Backing Track Scoop (dips where the vocal sits so you can hear yourself), Mid Scoop, Treble Cut.
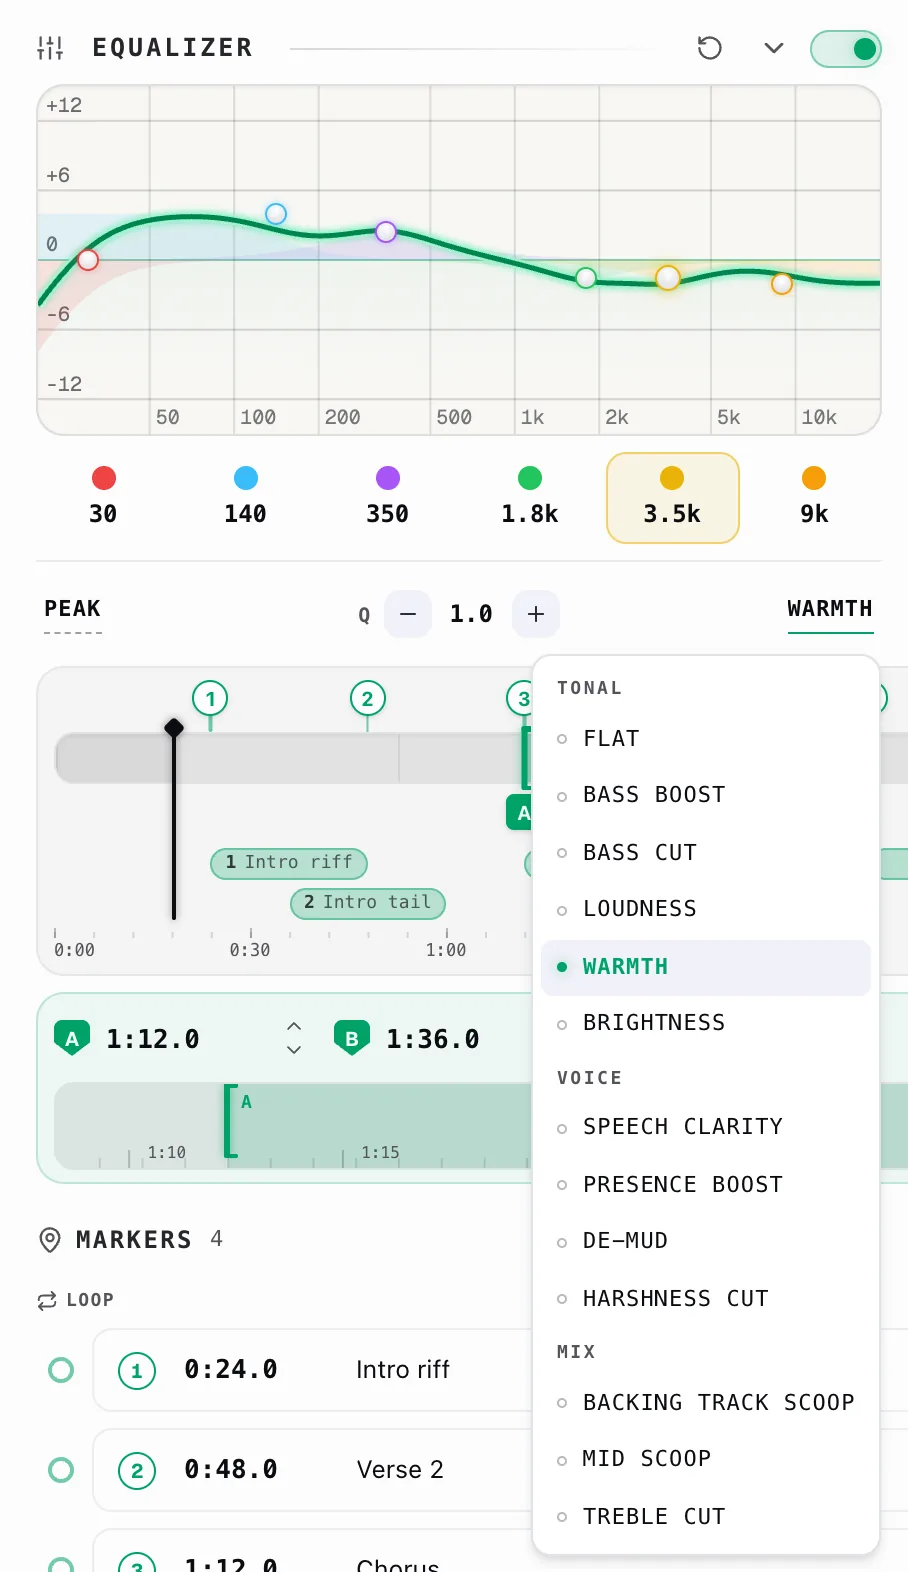
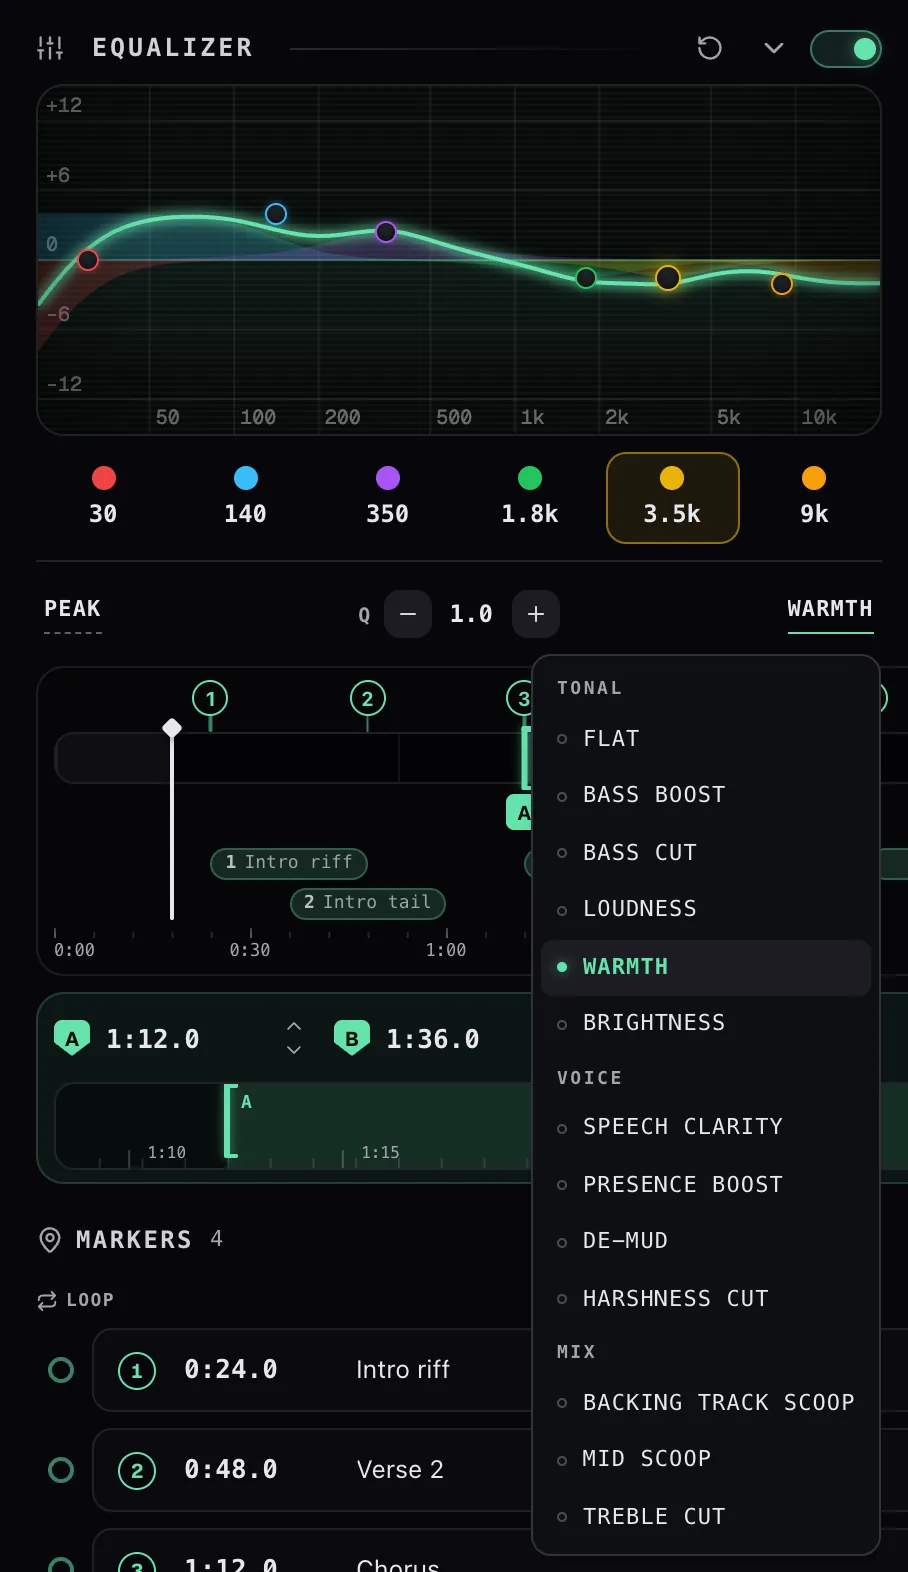
Double-click a handle on the curve to mute that band, and double-click again to bring it back. A muted handle fades but keeps its settings, so it is a genuine A/B test rather than a reset: you hear what that one band was contributing without losing the frequency, gain and Q you dialled in.
The scroll wheel over a handle adjusts Q — how wide or narrow that band reaches. Scroll up to narrow it. This one only works if you have turned on scroll to adjust in Settings; without it the wheel scrolls the panel, which is the sane default when the EQ sits in a long column.
The chevron collapses the module to a small preview curve when you want the space back, and the reset arrow puts every band back to flat.
Can I switch an EQ band to a high-pass or low-pass filter?
Yes — each band has a filter-type menu, so a band can peak, shelve, or cut as a high-pass / low-pass.
Pick HP (high-pass) on the lowest band to roll off rumble below it, or LP (low-pass) on the top band to tame hiss and harsh highs above it; the middle bands work as peaks or shelves for lifting or dipping a range. Each band still has its frequency, gain and Q (how wide it reaches), so you can go from a gentle tilt to a surgical notch.
- Peak — a bump (or dip) at one frequency; the everyday band for boosting or cutting a range. Its Q sets how wide.
- HP (high-pass) — lets the highs through and rolls off everything below it; use it low to remove rumble.
- LP (low-pass) — the opposite: keeps the lows and rolls off everything above it; tames hiss and a harsh top end.
- Lo Shelf — lifts or drops everything below a point by a set amount; a broad bass / warmth control.
- Hi Shelf — the same for everything above a point; a broad air / brightness control.
- Notch — a narrow, deep cut to kill one problem frequency (a hum, whistle, or resonance).
Two that are easy to confuse:
- HP vs Lo Shelf — a high-pass keeps cutting harder the lower it goes; a low shelf drops the bass by a fixed amount and flattens out. Use HP to remove, the shelf to reduce.
- Notch vs a Peak cut — a notch is surgical and near-total at one frequency; a peak cut is gentler and you choose how much.
Only Peak and the two shelves have a gain to set — HP, LP and Notch just have a corner frequency. Q is fixed on the shelves, so it applies to every shape except those two.
Why is the equalizer the same on every track?
Because the equalizer is one setting for all of Capo, not a per-track one. It is the odd control out in the workspace, and it syncs across every browser you are signed into.
Almost everything else in the panel — pitch, speed, the loop, markers, clips, notes, the vocal shape — is remembered per track. The EQ is not. Set a curve and it stays until you change it.
That is usually what you want: an EQ here is normally correcting your headphones or laptop speakers, and those do not change when the song does.
If you want a tone change for one song only, use the per-track controls instead — Formant for vocal character, or a clip with its own settings for one section.
Two consequences of being global:
- The EQ is not in the share link. A link carries pitch, speed, volume and the loop, but the person opening it keeps their own curve.
- Turning the EQ off does not erase it. The switch and the curve are separate, and Reset flattens the bands while leaving the switch where it is.
The two panels look alike — same hairline sliders, same Reset shape button — so the difference is worth stating plainly:
- Reverb → Size, Damping, Pre-delay describe a room. You pick a room once and every track plays in it, so these ride with your settings and sync across your browsers.
- Vocal → Intensity, Focus, Range, Balance describe one particular mix — where that singer sits and how they were recorded. They are stored per track and come back when the track does.
The strip amounts follow the same rule as the shapes above them: the reverb and vocal amounts are per-track, so a song you dialled in once returns the way you left it.
Effects
What do Formant, Reverb, and Vocal do?


They are the three tone controls the free popup does not have — sitting beside Speed as console strips, each with a slider, a value, and a reset that appears on hover.
- Formant shifts vocal character without shifting the note. Push a big pitch change and a voice starts to sound like a chipmunk or a giant; formant pulls that back. Range −1.00 to +1.00.
- Reverb adds room. Its shape panel (the slider icon on the strip) opens three more controls: Size 0.3–5.0 s, Damping 0–100%, and Pre-delay 0–80 ms, with a Reset shape for the lot. These are global, not per-track.
- Vocal pushes the lead vocal down so you can hear the backing — useful for singing along or transcribing an accompaniment. Its shape panel adds Intensity, Focus, a frequency Range (default 120 Hz–6 kHz) and stereo Balance.
Formant and Vocal both depend on how Capo is processing audio — if either is greyed out, see Why is the Vocal control greyed out?
Why is the Vocal control greyed out?
Because the vocal reducer needs Capo's highest audio-quality mode, and you are on a lower one.
Capo processes sound at one of three tiers, set in Settings → Audio quality as Low, Med or High. The two heaviest features are tied to it:
- Vocal needs High. On anything lower the strip renders faded and does not respond.
- Formant needs Med or High — it is off only on Low.
Switch Settings → Audio quality to High and both come back. Higher tiers cost more CPU, so if playback starts stuttering on a heavy page that is the trade you are making.
Most often because the track is mono. The reducer works by comparing the left and right channels, and a mono file has no difference to compare — so Capo passes the audio through untouched rather than mangling it.
The control is not greyed out in that case, because nothing is wrong with your setup. It simply has nothing to work with.
The other reasons it can underperform, in rough order of likelihood:
- The vocal is not in the middle. Capo looks for whatever sits centred and equally in both channels — the usual home for a lead vocal. A voice panned off to one side slips past it. Nudge Balance toward that side to steer the search.
- It is not really a vocal problem. Bass, snare and kick usually sit dead centre too, so a track can end up with the drums ducking and the singer surviving.
- The voice is outside the range. The default window is 120 Hz – 6 kHz; anything outside it is left alone.
- Live recordings and heavy reverb spread a voice across the stereo field, which is exactly what the reducer uses to tell the voice apart from everything else.
This is a real-time trick, not a studio stem separation. On a dense mix expect the vocal pushed down, not removed.
Amber marks the point where the reducer stops being subtle. Past 75% Intensity, Capo mixes in a second, blunter technique on top of the careful one — and that is where audible damage starts.
Treat it as a warning strip, not a wall. If you need the amber zone to hear the vocal drop, try these first:
- Raise Focus to make the detector fussier before you make it stronger.
- Narrow the Range around the voice so the bass and cymbals are excluded outright.
- Steer Balance if the singer is not perfectly centred.
What are Varispeed and Preserve voice?
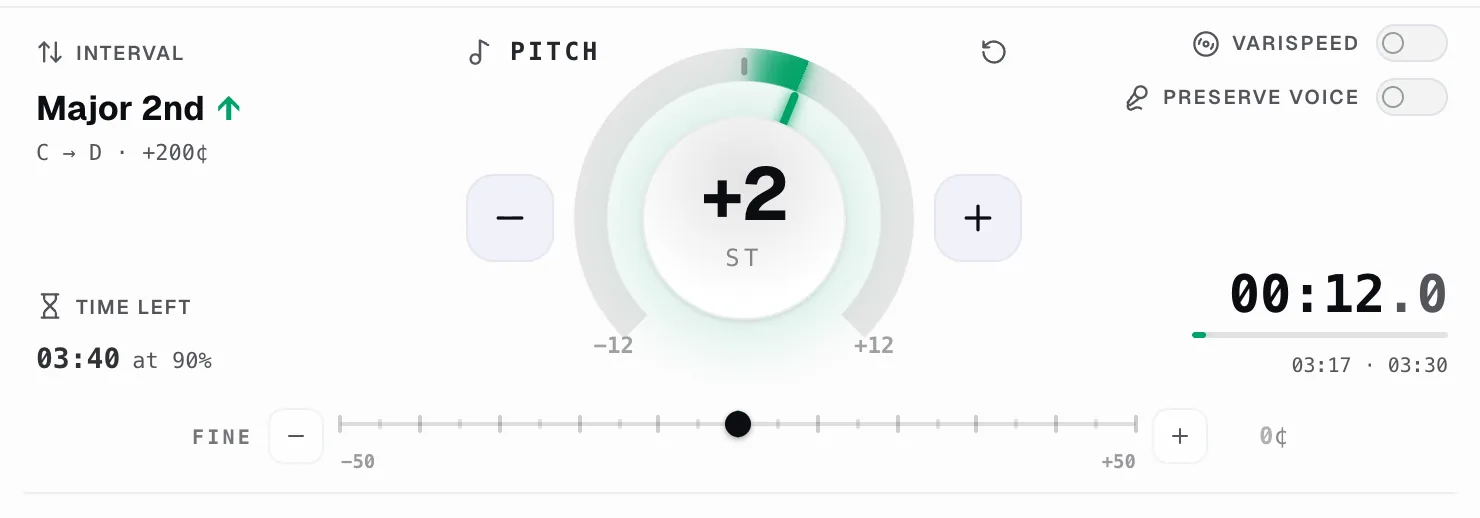
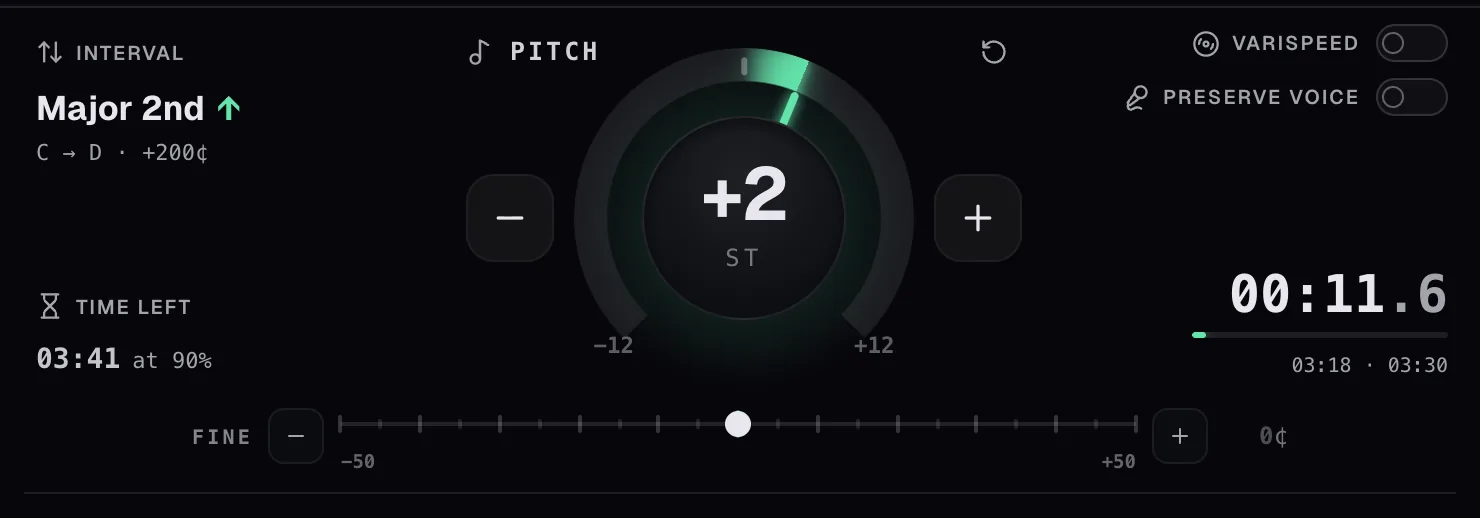
Two switches beside the pitch dial that change what happens when you move it.
Varispeed ties pitch to tempo, the way a tape machine or a record player does: slow it down and it drops in key, speed it up and it rises. That is the honest sound for anything you want to feel like the original medium, and it is what you want when a recording is simply running at the wrong speed. With varispeed on, speed runs from 0.5× to 2× in very fine steps, and the pitch dial covers a full octave either way.
So with Varispeed on you can’t move one without the other — which is exactly what you want when a recording is simply playing at the wrong speed, or when you want the honest, artefact-free sound of the original medium. Turn it off to go back to independent pitch and speed.
Preserve voice goes the other direction: it protects vocal character while you shift the key, so a singer still sounds like themselves a few semitones down. Leave it off for instruments; turn it on when a voice is the thing you are following.
Both are off by default, and both are ignored on pages where Capo only has audio to work with.
What is Reference tuning, and how do I match a recording at A=432?
Reference tuning corrects a recording that was not made at standard A4 = 440 Hz, so it agrees with the instrument in your hands. It lives in the workspace's pitch hero, and it is a Pro control.
You set two values, not one:
- Track — what the recording is tuned to.
- Instrument — what you are tuned to.
Capo works out the difference and shifts the track to meet you. For a 432 Hz recording played against a 440 Hz instrument, that is +32 ¢ — the track comes up to you. Set Track to 432, leave Instrument at 440, and you are done.
Both rows carry preset menus of the tunings that actually turn up on recordings:
- 392 French Baroque · 415 Baroque · 430 Classical
- 432 Verdi · 440 Concert · 442 Orchestral · 466 Chorton
You are not limited to those — either row steps a hertz at a time anywhere from 380 to 500 Hz.
Watch the dial and the Fine slider while you do it. The correction is written straight into them rather than hidden away, so the controls always show what you are hearing: a 432 → 440 match reads as 0 st and +32 ¢, and a baroque 415 → 440 match reads as +1 st and +1 ¢.
The tempo is untouched — unless you are in Varispeed, where the correction rides the tape speed like it would on a real deck, and the control says so.
Capo keeps both hertz values per track, so a recording you have matched once comes back matched.
If you cannot find it: it needs Pro and its switch in Settings. With the switch off, that corner of the hero shows the interval readout and the session clock instead — you get one or the other, never both.
Can I rearrange the Speed, Formant, Reverb and Vocal strips?
Yes — drag a strip by its name. The label is the handle; there is no separate grip to aim for.
Grab Speed, Formant, Reverb or Vocal and the others glide out of the way. From the keyboard, tab to the name and press ↑ or ↓ to move it one slot.
The order is saved with your settings and syncs across your browsers, so the strip you reach for most can sit at the top.
A dimmed strip can still be dragged. Only the slider itself goes inert when a control is unavailable — the name and the reset stay live, so you can park an unusable strip out of the way instead of looking at it.
Past about 660px of panel width the strips lay out two-up, and the order runs left to right, then down.
Down to the footer. In the workspace, volume lives on the speaker icon beside the transport buttons — hover or tab to it and a vertical fader slides out.
The four console strips are Speed, Formant, Reverb and Vocal. Volume used to be one of them and was moved when the vocal reducer arrived, for a practical reason: volume is the one control that still works on sites that play audio without a real media element, so it sits outside the block that dims on those pages.
Things worth knowing about the fader:
- Clicking the speaker mutes, the way it does on YouTube. Clicking again restores the level you were at.
- A mint dot on the icon means the volume is not at 100%. You need it, because the level itself is hidden while the fader is closed.
- 100% sits halfway up the track, not at the top. Everything above it is boost, and that half is hatched so you can see at a glance that you are louder than the site shipped.
- It moves in 5% steps, up to 300% — or 600% with the extended volume range turned on in Settings. Double-click the track to snap back to 100%.
What is low latency mode, and where do I find it?
Low latency mode trims the delay between moving a control and hearing the change. It is a single switch — but a hidden one: it appears only when you have Pro and Audio quality is set to High.
Where it is. Settings → Audio & playback, directly beneath Audio quality. On any other setup the row is simply not there: free accounts never see it, and neither do the Low or Med quality tiers — High is the only mode it changes, so Capo does not show a switch that would do nothing.
What it does. High quality runs on Capo’s most detailed pitch engine. Low latency swaps in that engine’s Faster mode, so your changes land noticeably sooner — at the cost of a little audio quality. Turn it on when you are playing along live and the lag between your hands and the sound is throwing you off; leave it off when you just want the cleanest possible tone.
The one catch: it cannot run at the same time as a formant shift. The Faster engine has no formant stage, so if the tab you are on has any formant applied, the switch greys out until you set formant back to zero — the row says as much under its label.